Evolution (Linux)
Barrier-free
This page contains alternative texts for images/graphics.
Setup
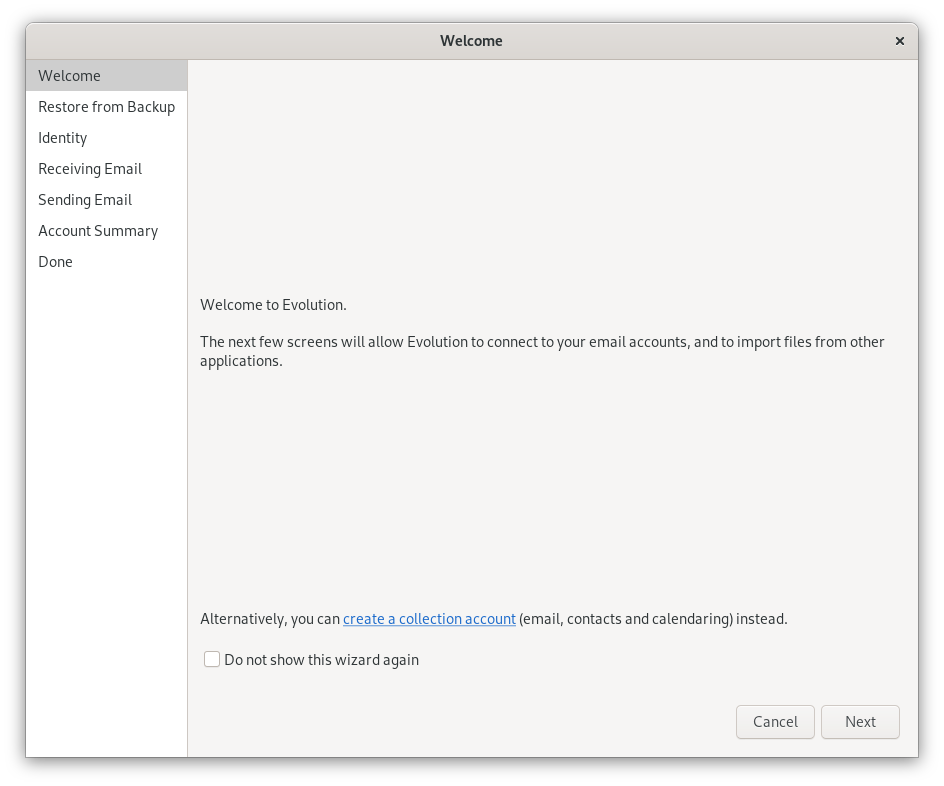
When you start Evolution for the first time, or if you haven't set up an account yet, a wizard will automatically start to help you include your email accounts.
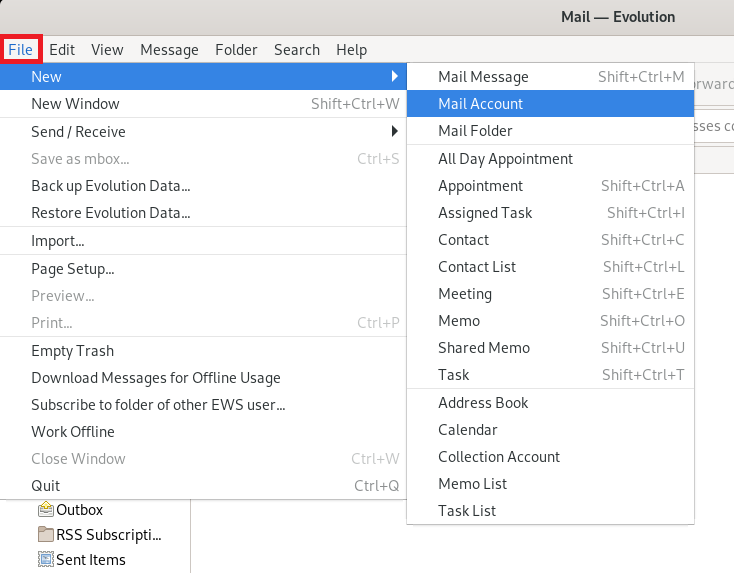
If you have already included email accounts in Evolution, you can start the setup dialog as follows:
File → New → Mail Account
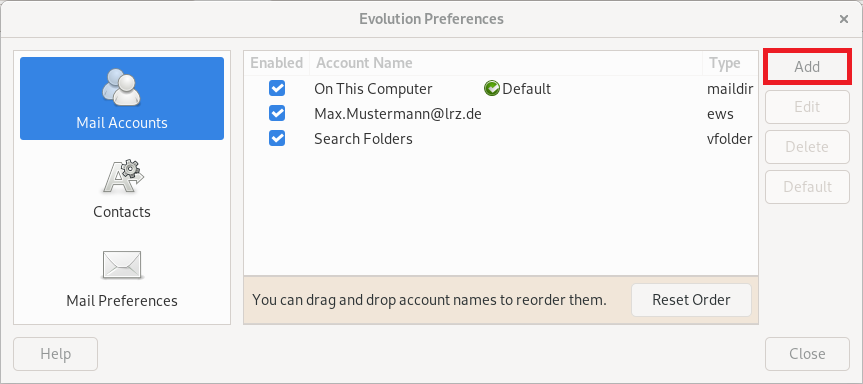
... or via the Preferences of Evolution:
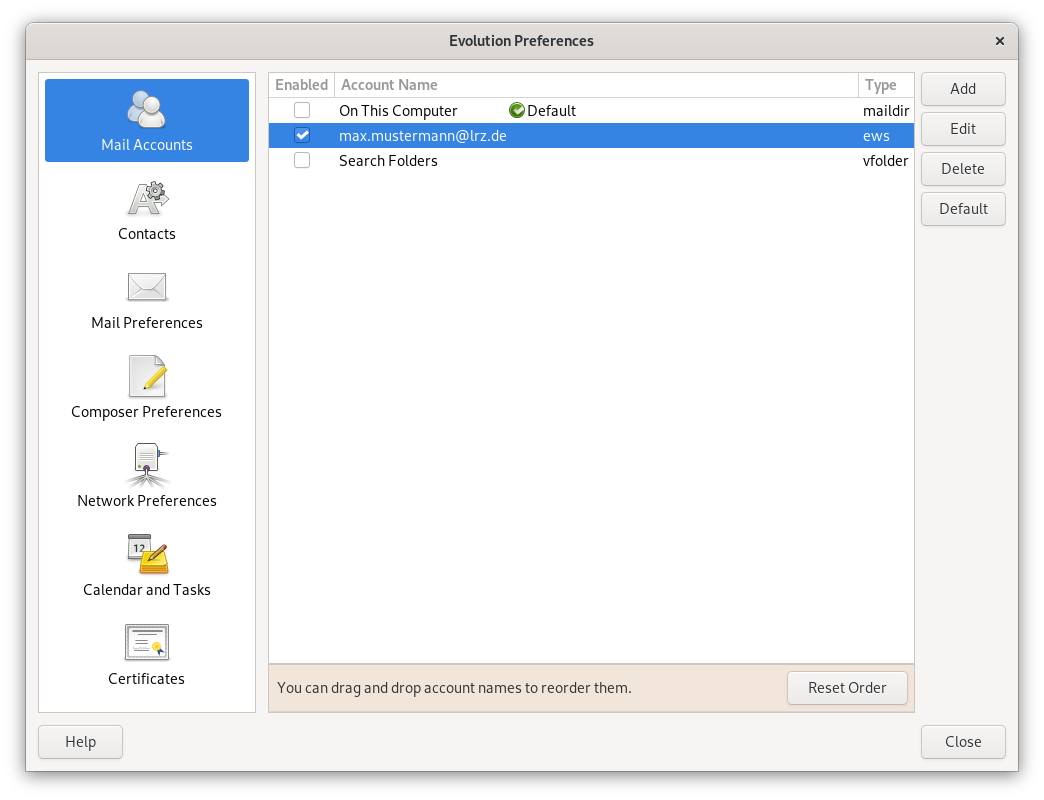
Edit → Preferences
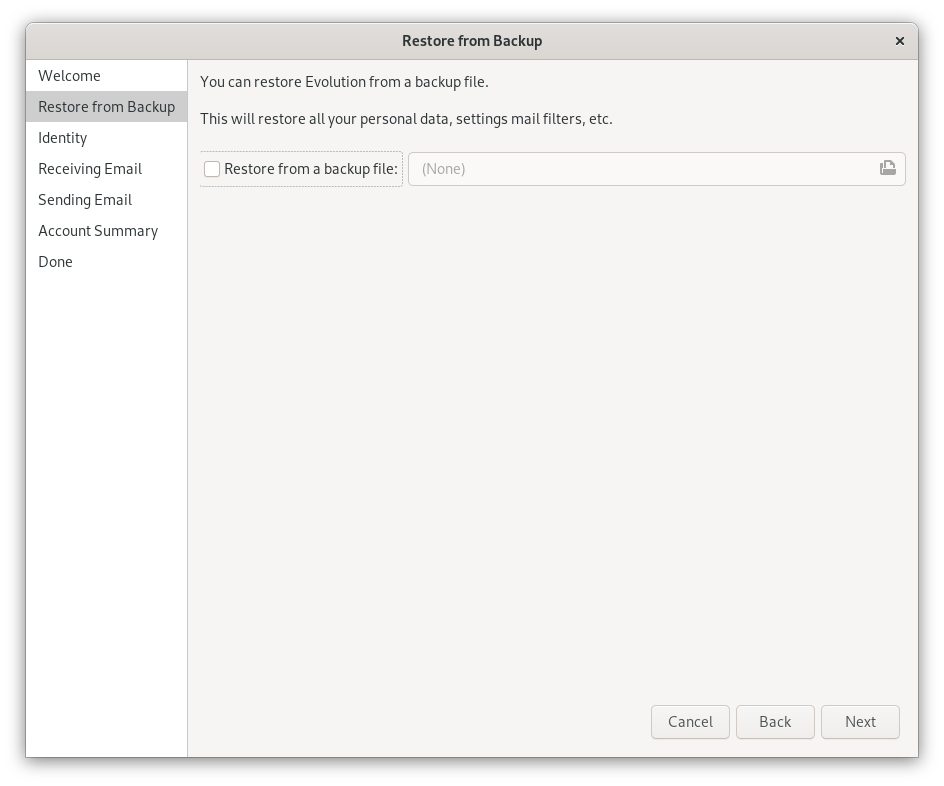
In the next step, you have the possibility to restore Evolution from a backup file. Click Next.
Please note, this option is only available if you are launching Evolution for the first time.
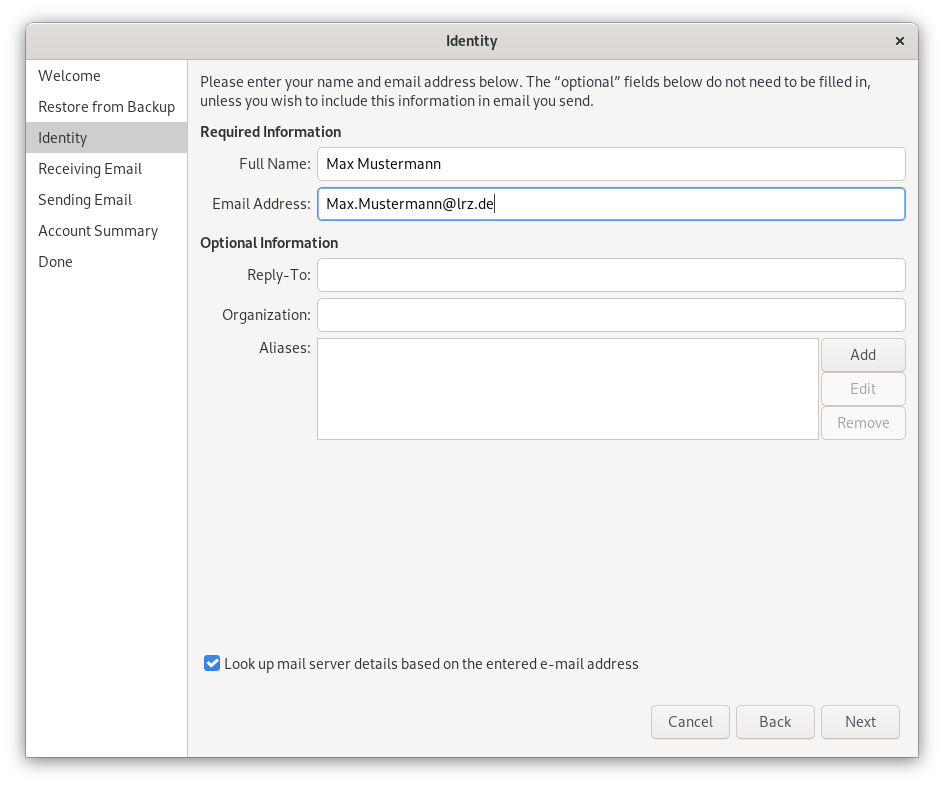
Enter your Full Name and Email Address here and confirm with "Next".
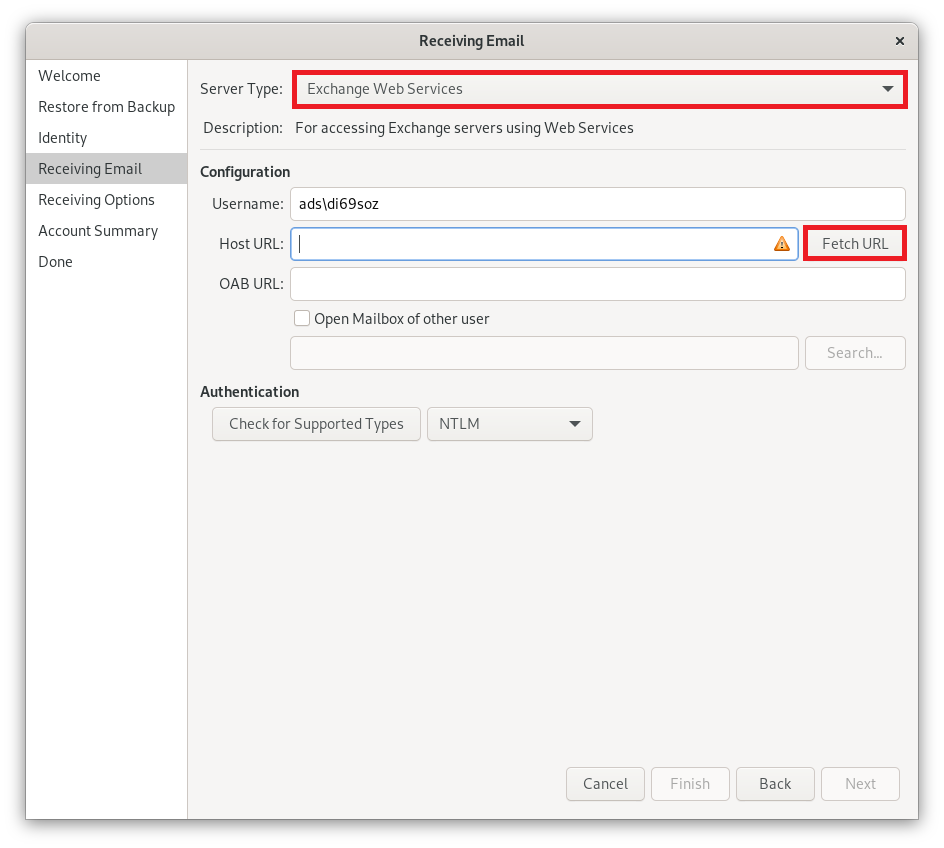
Select here at "Server Type" Exchange Web Services. And for User name, enter your account preceded by " ads\ ".
Click Fetch URL and confirm the following Host URL:
You will now be asked for your password. Enter this and click OK.
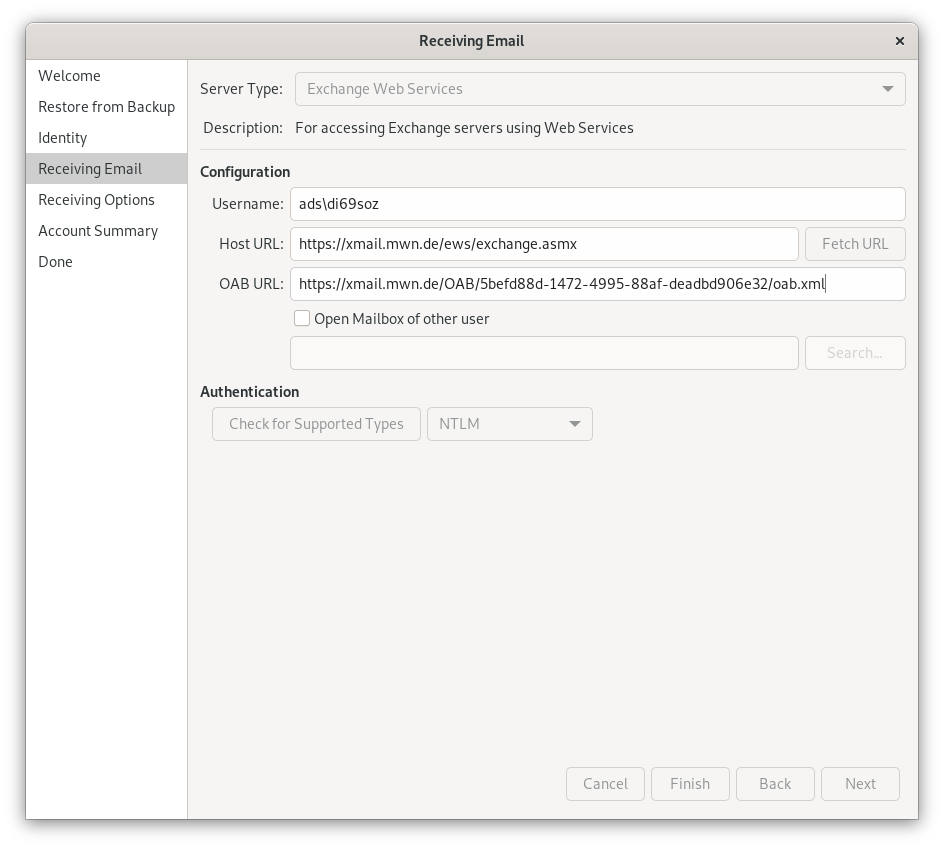
After authentication, the Host URL and the Url to the offline address book (OAB URL) is automatically configured.
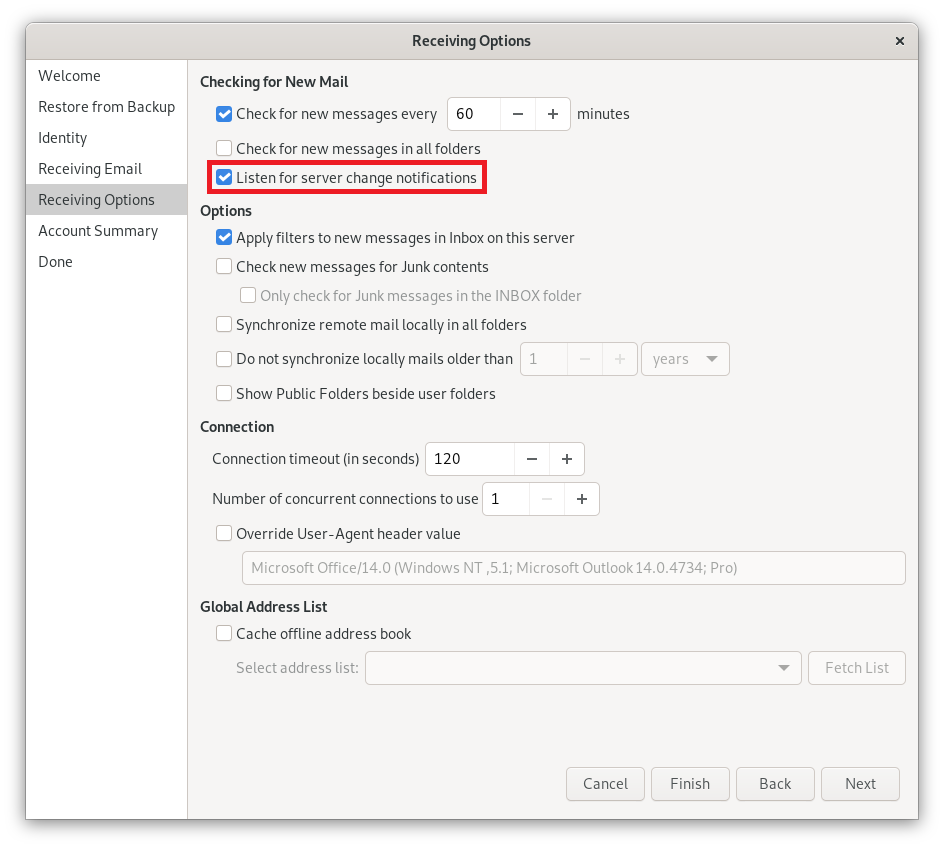
Make sure that the "Listen for server change notifications" checkbox is checked so that emails can be automatically retrieved from the server.
In the next step you can change the name of the Account Information.
Then you can complete the setup.
Shared Mailbox
Shared mailboxes offer the possibility to work together on a mailbox. Application scenarios are, for example, function addresses (such as info@domain.de) or common chair calendars (e.g. for vacation planning) or even common contacts of the chair, which all may read or which several people manage together.
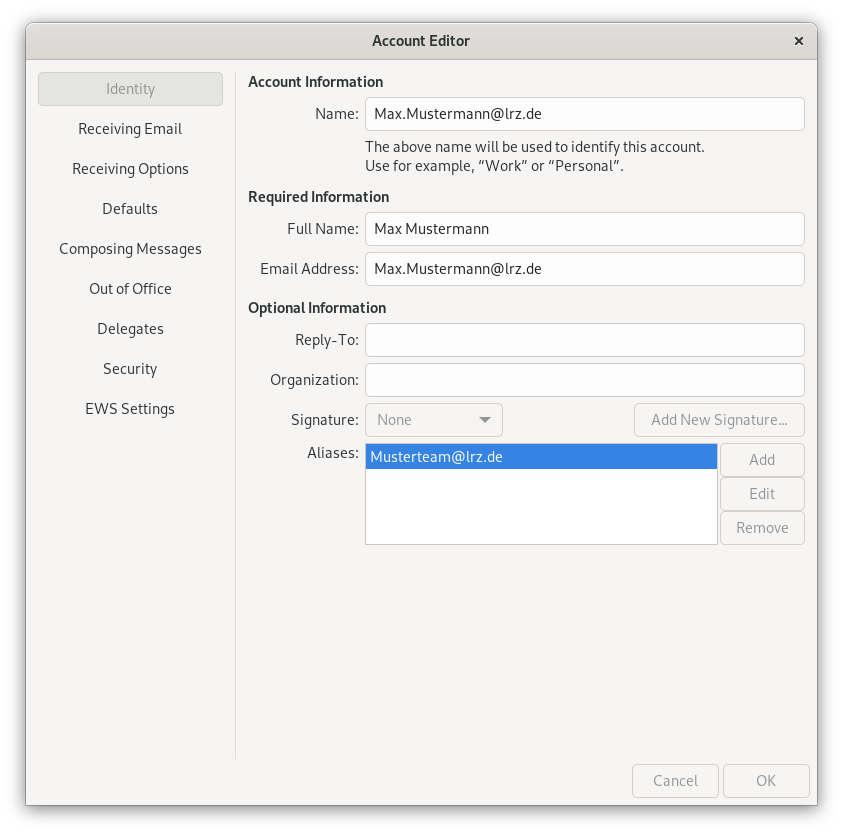
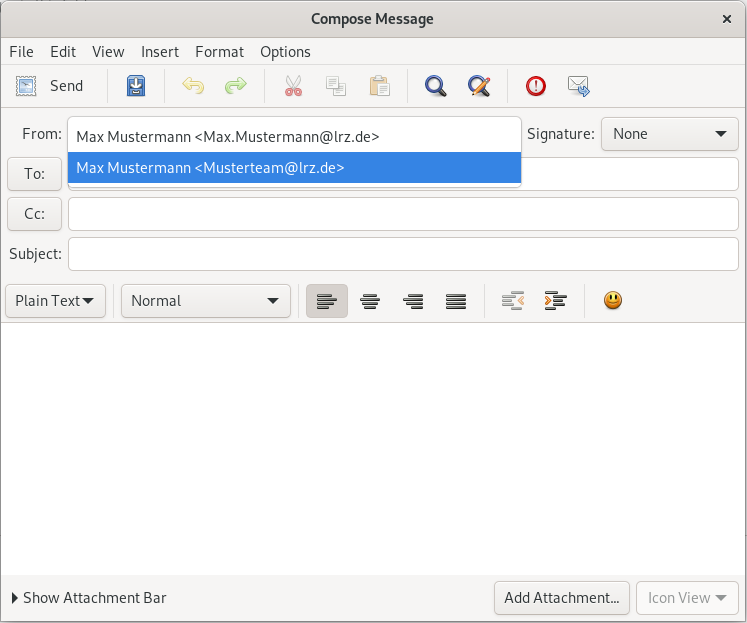
In Evolution, you do not include a shared mailbox as another mailbox as in Outlook, but you subscribe to the individual folders of the shared mailbox. A shared mailbox is therefore included in the same way as the shared folders of another user. The mail address of the shared mailbox is entered as an alias in your own account. Then, when sending an email, you can select the desired sender address from a drop-down menu.
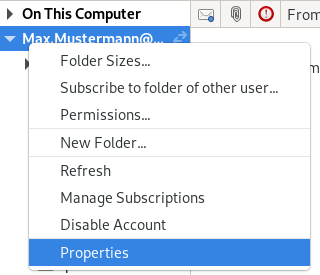
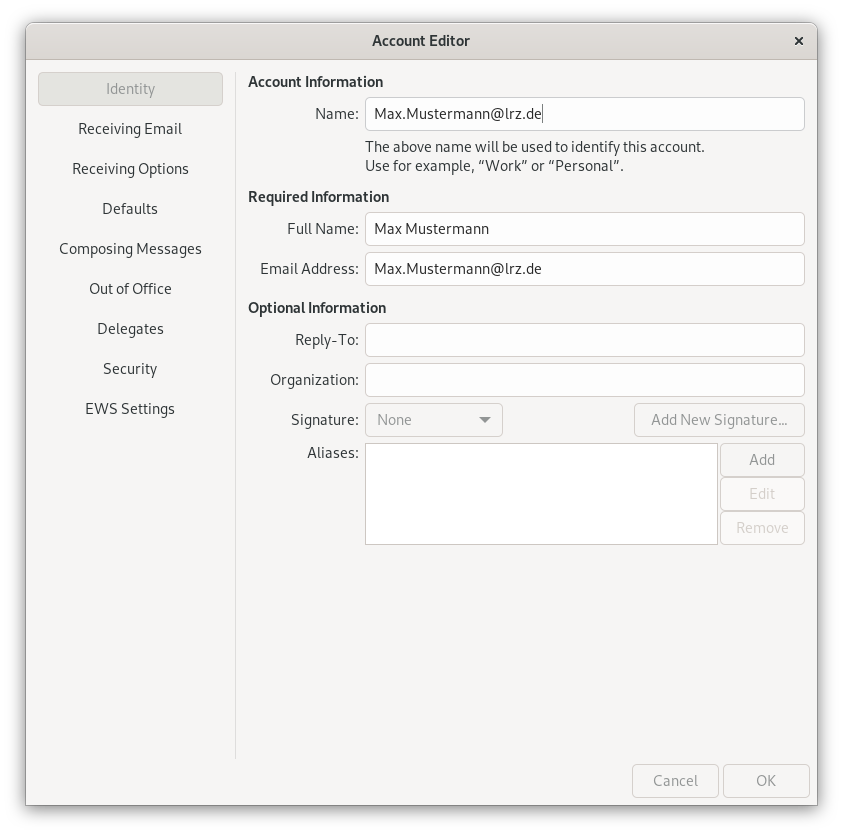
First, add the main mail address to the shared mailbox as an alias. To do this, open the properties by right-clicking on the top level of the mailbox (here: Max.Mustermann@lrz.de).
Then click "Add" at the bottom right of the window. Enter the mail address of the shared mailbox in the line that appears and click "OK".
If you want to write an email from the shared mailbox now, click on "New". Click on the field where the sender address is located and then select the desired sender address.
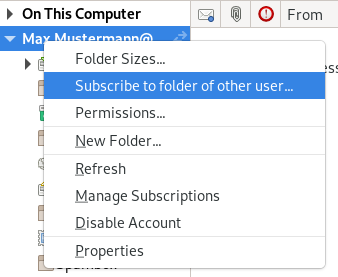
Then subscribe to the mail folders. Again, right-click on the top level of the mailbox and then select "Subscribe to folder of other user...".
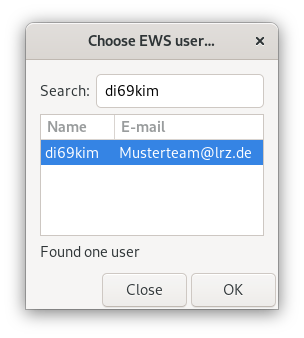
To search for the shared mailbox, click Choose and enter the identifier or email address and select the mailbox from the list.
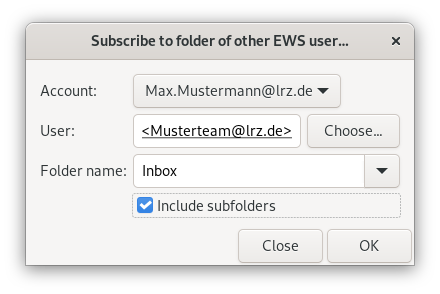
Then select "Inbox" in the "Folder name" drop-down menu, check "Include subfolders" and click "OK".
Add the calendar to the shared mailbox in the same way, but instead of Inbox select Calendar.
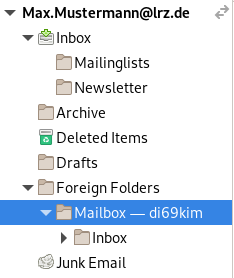
You now find the subscribed folders in your mailbox under "Foreign Folders". This is not a real folder in your mailbox. The developers of Evolution came up with this way of displaying shared folders. In other clients or in Ooutlook on the Web "Foreign Folders" does not appear, there a different display is used.
Delegation
Set up delegate access
Open the settings and select the account for which you want to enter a delegation.
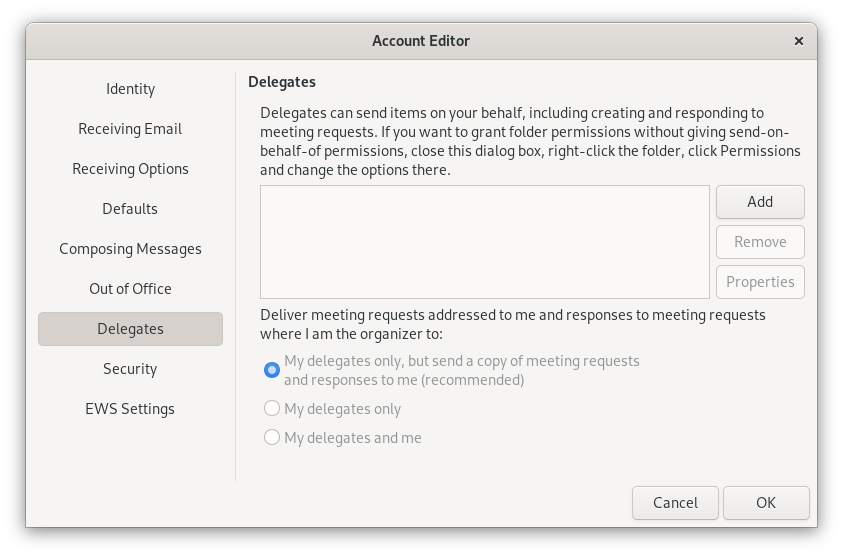
Click on edit and then select "Delegates" in the column on the left side. Then click add.
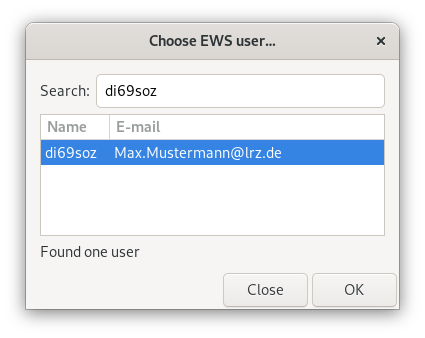
In the next window, search for the person who will represent you. To do this, search for the account, or e-mail address and then select the correct person from the list. Confirm the selection with "OK".
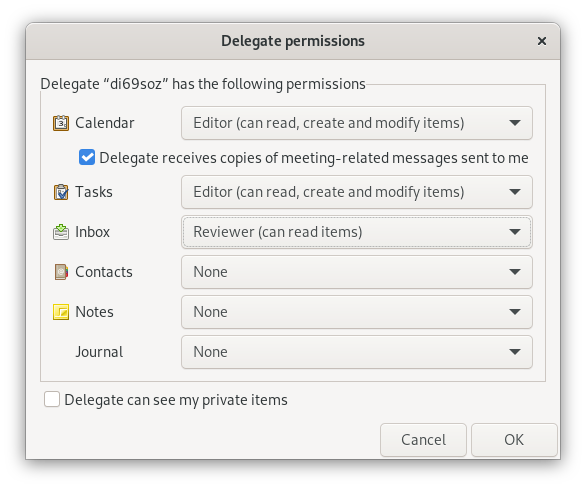
In the following window, select which parts of your mailbox your delegation may access and with which authorization. Then confirm twice with "OK".
Use delegation
If you have been given a delegation and want to use it in Evolution, set it up like a Shared Mailbox.
Calendar
Share calendar
Switch to the calendar view by clicking "Calendar" in the column on the left side at the bottom.
Select the calendar you want to share, right click on it and select "Permissions...".
Click "Add" to search for the person you want to give permissions to your calendar.
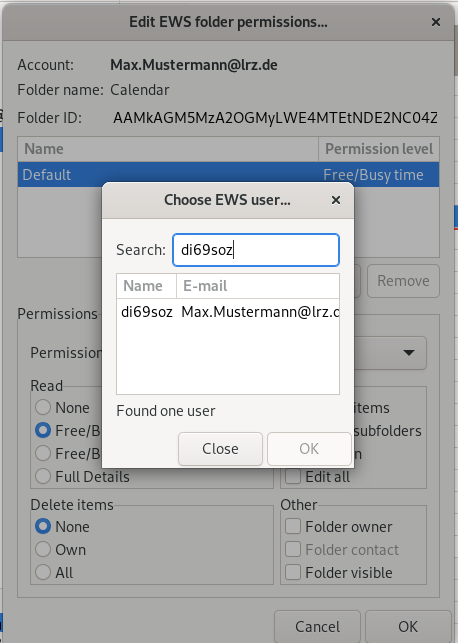
You can search for the account or the E-Mail address. Select the right person and confirm the selection with "OK".
Then you can set the access rights: You can select a permission level or select the permissions individually.
To save these permissions click "OK".
Open a shared calendar
To open a shared calendar, you need to subscribe to it like a shared folder.
Switch to the Mail view and right-click on the top level of the mailbox (the email address written in bold) and then select "Subscribe to folder of other user...".
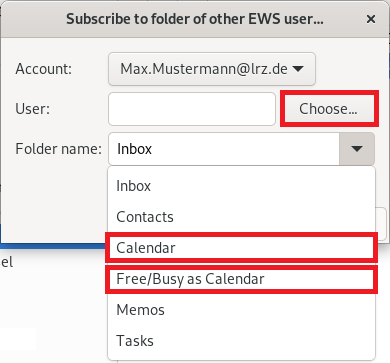
Click on "Choose" and there search for the user whose calendar you want to open.
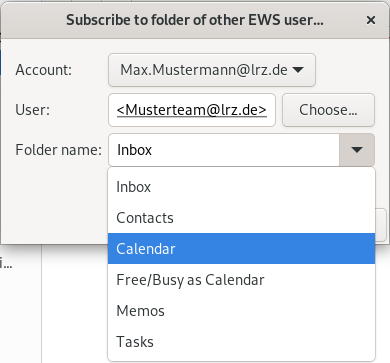
If you only want to open the free/busy times, select "Free/Busy as calendar" from the drop-down menu next to "Folder name".
If you have been given higher permissions on the calendar, then select Calendar.
Email Rules
To increase the clarity in a mailbox, it is often useful to automatically sort incoming emails into other folders based on certain criteria. Exchange offers you the possibility to create server-side filter rules.
In Evolution you will find the item "Message Filters" in the menu under "Edit". If you click on it, the adjoining window opens:
Here you can create new rules or edit existing ones.
Examples for filter rules
Filter newsletters...
In order for newsletters to be filtered, we have introduced tagging for some major newsletter senders, which is done through special header lines in the email. Create a rule that will be applied to messages you receive.
Then select "Specific header" and then type in the blank field next to it:
"X-Newsletter ISP" and
"X-Newsletter Sender."
Select "exists" from the next field on the line.
Then select the folder where the newsletters should be moved to. Finish with "OK".
Filter mailing lists...
To filter out emails from mailing lists create a rule analogous to the newsletter rule. Check for the "List-Id" and "List-Unsubscribe" header fields and move these emails to the desired folder.
Note, if you want to filter newsletters as well, that many newsletters also use these fields. That is why the filter for newsletters should come before the filter for mailing lists in the list of filter rules.
How do I set up an out of office message?
To do this, proceed as follows:
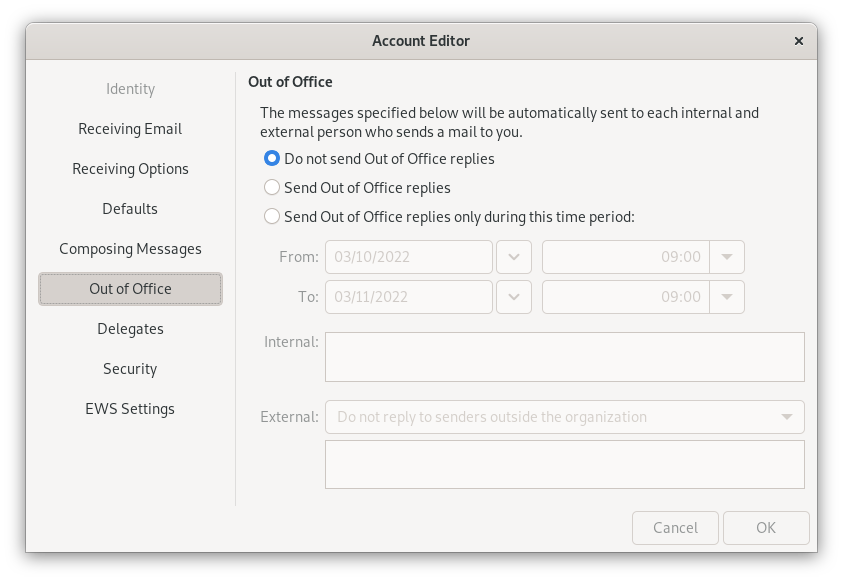
- Preferences → Mail Accounts → Select your account → Out of Office
You can configure different out of office messages for senders inside (all users on the Exchange Server) and outside the organization.
By the way, your out-of-office message will not be triggered by mail from mailing lists or mail marked as spam.
Encrypt and sign
In order to send e-mails signed or encrypted with S/MIME using Outlook, you need a personal user certificate.
As a member of TUM, you can find information on how to apply for a certificate at https://www.it.tum.de/en/it/certificates/. If you have any difficulties in doing so, please contact the IT support of TUM (it-support@tum.de).
For the other institutions of the MWN, we are currently not aware of any way to obtain a personal user certificate.
Please pay attention to the correct format when downloading your certificate. Unfortunately, some operating systems (e.g. Windows, MacOS) only support TripleDES-SHA1.
For further information, please visit https://doku.tid.dfn.de/de:dfnpki:tcs:usercert#auswahl_des_key_protection_algorithms_in_formularen_fuer_p12-dateien.
Please note that the encryption method with S/MIME described here is not compatible with the PGP method which is especially widespread under Unix/Linux. PGP is not supported by some Exchange clients or require a plugin for PGP.
Briefly, the essential properties of signed and encrypted e-mails:
- Signing an e-mail ensures that it cannot be manipulated unnoticed on its way from the sender to the recipient. Whether the e-mail is transmitted in encrypted form depends on whether the mail systems involved support transport encryption.
- By encrypting an e-mail, the content is already encrypted before it is sent and is therefore transmitted in encrypted form (and also stored in the mailbox in encrypted form) regardless of the properties of the mail systems involved. When working with encryption, it is essential to keep your own certificate (especially the private key) in a loss-proof manner, as otherwise encrypted e-mails can no longer be read - neither those you have encrypted yourself nor those you have received.
General preparations
Before you can sign or encrypt e-mails, you have to import your user certificate on your computer. If you want to send digitally signed or encrypted e-mails from multiple computers, you must import the certificate on each of these computers. This also applies if you want to read encrypted emails on multiple PCs.
Before you can sign or encrypt email, you must import your user certificate into Evolution. If you want to send digitally signed or encrypted emails from multiple computers, you must import the certificate on each of those computers. This is also the case if you want to read encrypted emails on multiple PCs.
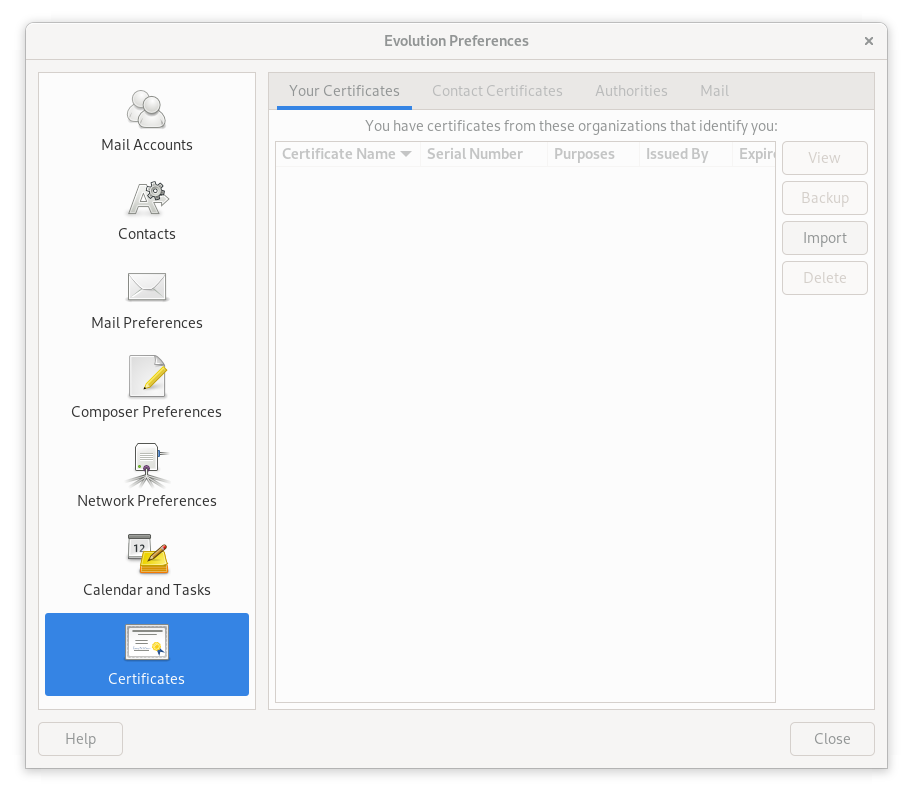
Open the preferences in Evolution and select the "Certificates" item.
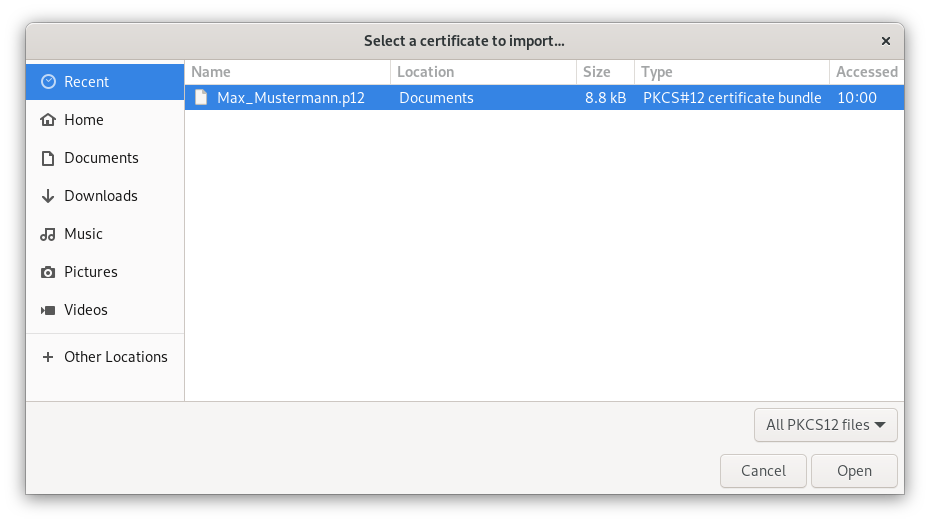
By clicking on "Import" you can search for the certificate in your files. Select the certificate and confirm with "Open".
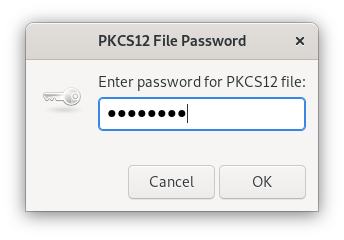
A new window opens asking you to enter a password. This password was set by you before you exported the certificate and the associated private key to the P12 file.
Now, after you have imported the certificate, switch from Certificates to Mail Accounts. Select the account for which you have requested the certificate and for which you want to add the digital signature.
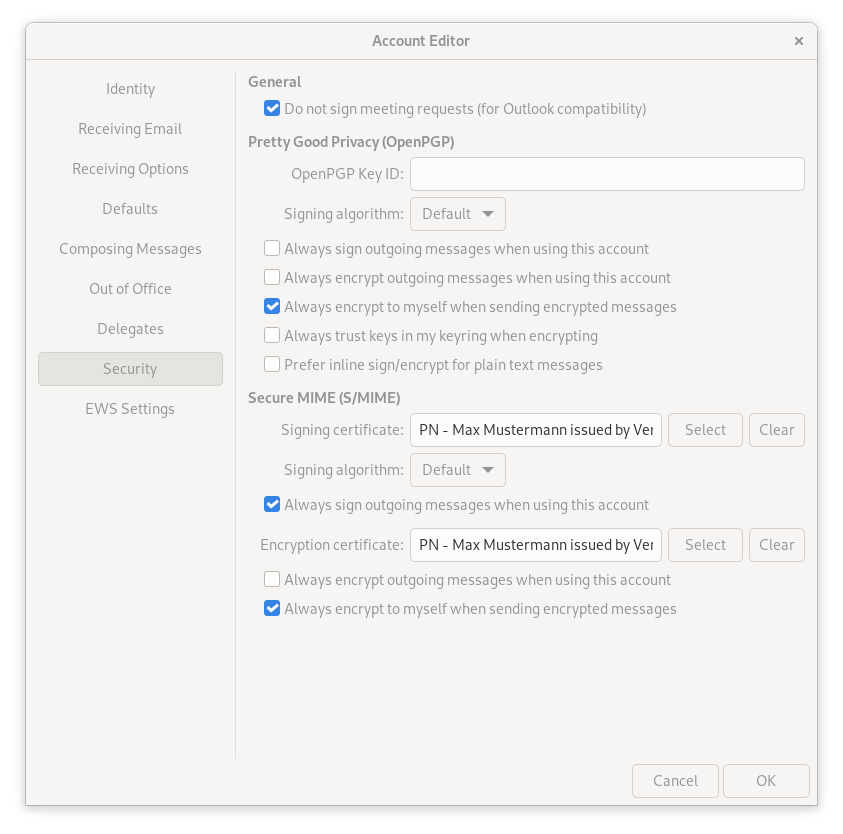
Click on "Edit" and select the "Security" item.
At Secure MIME (S/MIME), click Select next to Signing certificate and Encryption certificate. Then select the certificate you want to use.
Finally, click OK.
Signing emails digitally with S/MIME
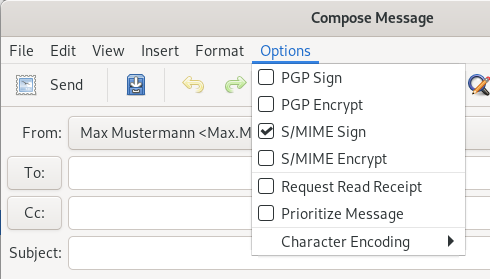
To add a digital signature to an email in Evolution, go to the "Options" tab before sending and click "S/MIME Sign". If you want to automatically sign every email, you can configure this in the Security Settings.
Encrypting emails with S/MIME
If you want to encrypt an email, proceed in the same way as for signing an email. Select the option "S/MIME Encrypt". In contrast to signing, you need not only your own certificate, but also the certificate (more precisely: the public key) of the mail recipient.
How do I get the public certificate of a recipient?
To send encrypted emails you always need the certificate of the recipient. If you do not have this, there are several ways how you can possibly find the certificate:
A digitally signed or encrypted email from the recipient.
If you have already received a digitally signed or encrypted email from the recipient, the public certificate was also sent to you in this email. As soon as you have opened this email, Outlook for Mac saves the certificate in its own keychain and you can send encrypted to this recipient.
Notes
Documentation from Evolution: https://help.gnome.org/users/evolution/stable/index.html.en
Typical error messages
Why can't I send emails anymore?
If you have sent a lot of emails or emails with a large number of recipients in one day, it is possible that you will not be able to send any more emails and the message on the right will appear.
As explained in this message, you have exceeded the limit of 250 recipients within 24 hours. The limit resets automatically after 24 hours.
The purpose of the limit is to ensure that only a limited number of emails are sent, even via compromised accounts, and thus to minimize the risk of LRZ mail servers ending up on so-called "denylists".
Own mailbox full
Your mailbox has a certain size (usually 5 GiB). If you exceed it, you will not be able to send or receive emails.
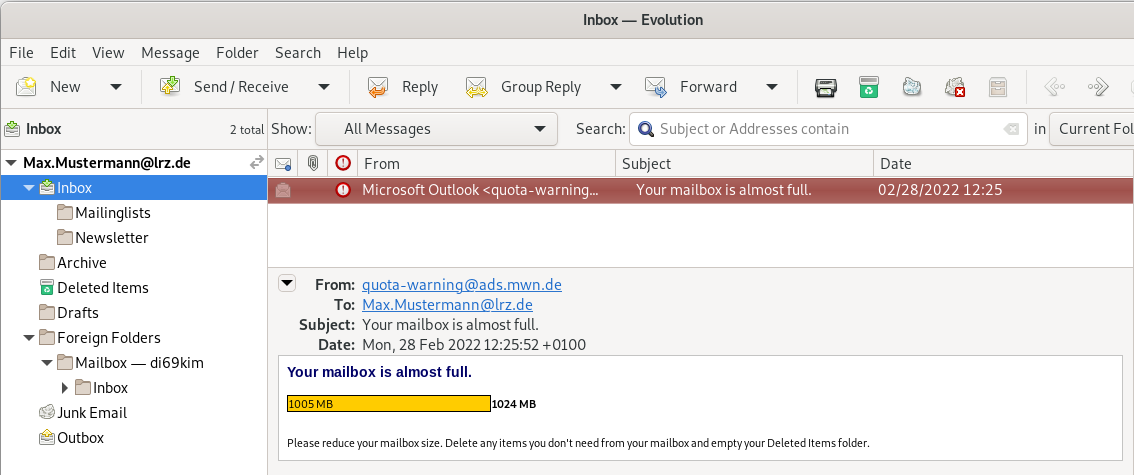
When you reach the limit, you will first receive a warning mail (from quota-warning@ads.mwn.de). If the memory consumption continues to increase, you will no longer be able to send messages. If the quota is significantly exceeded, you will also no longer be able to receive messages.
If you have reached the limit for sending, the adjacent message will appear when you try:
If you have reached the limit for receiving, the following banner will appear when you try to edit and save emails:
Your changes will not be transferred to the server.
From this point on, you will no longer be able to receive and send emails.
Destination mailbox full
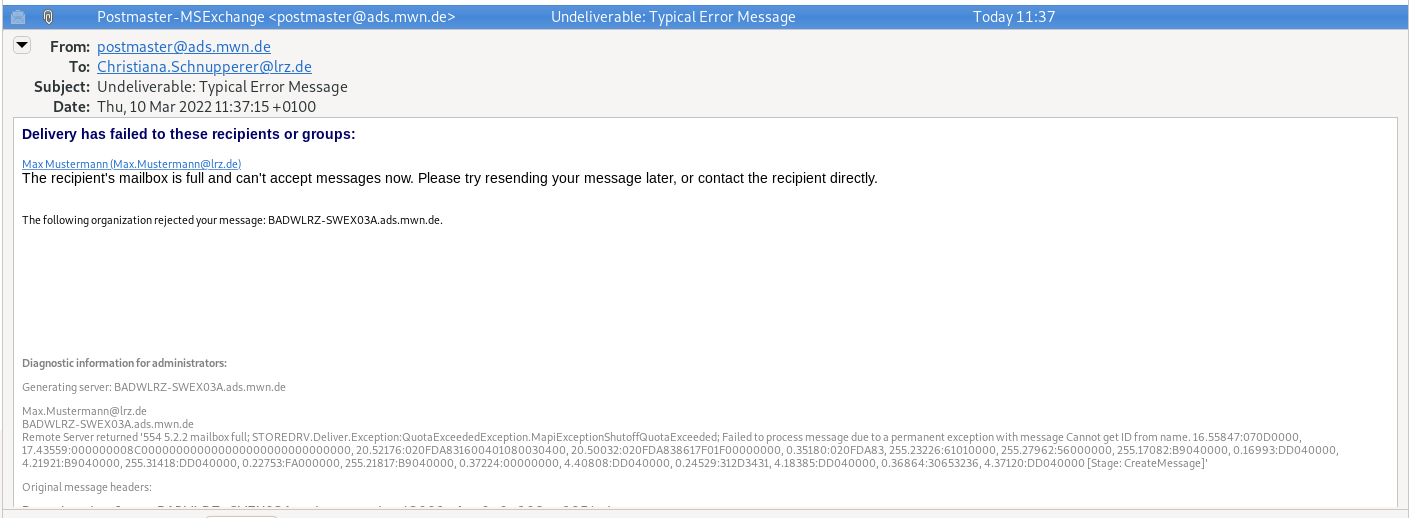
It is also possible that the mailbox of the person you want to send an email to is full.
You will receive an undeliverable notification in a timely manner. This may look something like this.


