Two-Factor Authentication via Yubikey
1. Prerequisite
This method requires the purchase of the hardware token YubiKey and installation of the YubiKey Manager on your local computer in order to initialize the YubiKey with a private key ("seed"). This so-called AES secret must be written to the device as well as registered in the SIM-MFA portal. Using this key, the YubiKey will be able to generate one-time passwords (OTPs) needed as a second factor to login to the Linux Cluster.
Use a single YubiKey for multiple purposes
As the YubiKey may have two slots, it can be used for two different purposes! If you already use such a YubiKey, you may not need to buy a new one. You only have to configure a free slot for 2FA access to LRZ systems.
2. Configure YubiKey
Installation of the Yubikey manager and configuration of the YubiKey via commandline (Ubuntu / Debian / other Linux OS / macOS)
| Step 1 for Linux (Ubuntu/Debian): Install YubiKey Manager | |
|
The YubiKey packages are available by default in recent releases of Debian and Ubuntu. You may use apt to perform the most comfortable installation: $ sudo apt update $ sudo apt install yubikey-manager $ sudo apt install yubikey-personalization |
|
| Step 1 for macOS: Install YubiKey Manager | |
|
The installation is done via Homebrew. This may require administrator privileges. $ brew install ykman |
|
| Step 1 for other Linux OS (e. g. SUSE): Install YubiKey Manager | |
| The installation may be done by building the YubiKey manger source code, which can be downloaded here:
https://www.yubico.com/products/services-software/download/yubikey-manager/ |
|
| Step 2: Test YubiKey | |
|
Connect the YubiKey to the USB-port of your computer and run following commands: $ ykman list $ ykman info |
YubiKey 5 NFC (5.2.7) [OTP+FIDO+CCID] Serial: 12345678 Device type: YubiKey 5 NFC Serial number: 12345678 Firmware version: 5.2.7 Form factor: Keychain (USB-A) Enabled USB interfaces: OTP, FIDO, CCID NFC transport is enabled. Applications USB NFC OTP Enabled Enabled FIDO U2F Enabled Enabled OpenPGP Enabled Enabled PIV Enabled Enabled OATH Enabled Enabled FIDO2 Enabled Enabled |
| Step 3: Configure YubiKey | |
|
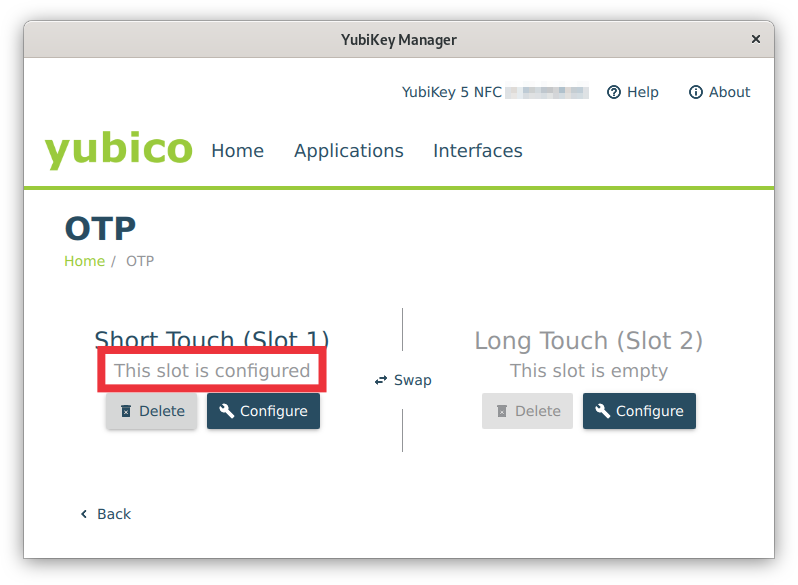
The YubiKey has two slots for storage of AES secrets with different usage:
Run the YubiKey Manager CLI in order to write the AES secret to the according slot of the YubiKey and answer the questions as shown below:
Slot 1
Configuration command
$ ykman otp yubiotp --serial-public-id --generate-private-id --generate-key 1
exemplary output and interactive configuration steps
Using YubiKey serial as public ID: vvccccvblhlu
Using a randomly generated private ID: a4b67dc931a1
Using a randomly generated secret key: c157d96a6b551f8b9414ab6d94b6a54c
Upload credential to YubiCloud? [y/N]: N
Program an OTP credential in slot 1? [y/N]: Y
or
Slot 2
Configuration command
$ ykman otp yubiotp --serial-public-id --generate-private-id --generate-key 2
exemplary output and interactive configuration steps
Using YubiKey serial as public ID: vvccccvblhlu
Using a randomly generated private ID: a4b67dc931a1
Using a randomly generated secret key: c157d96a6b551f8b9414ab6d94b6a54c
Upload credential to YubiCloud? [y/N]: N
Program an OTP credential in slot 2? [y/N]: Y
Copy the output of line "Using a randomly generated secret key"! This is the secret AES key which you will need to complete the rollout of the YubiKey token. |
|
Installation of the Yubikey manager GUI (Linux / Windows / macOS)
|
Please visit the Yubico download page and select your operating system. You may be redirected to further instructions or direct software downloads. Please refer to the Yubico documentation for installation details on various operating systems:
|
Configuration of the YubiKey via GUI (Linux / Windows / macOS)
| Step 1: Start YubiKey Manager GUI | |
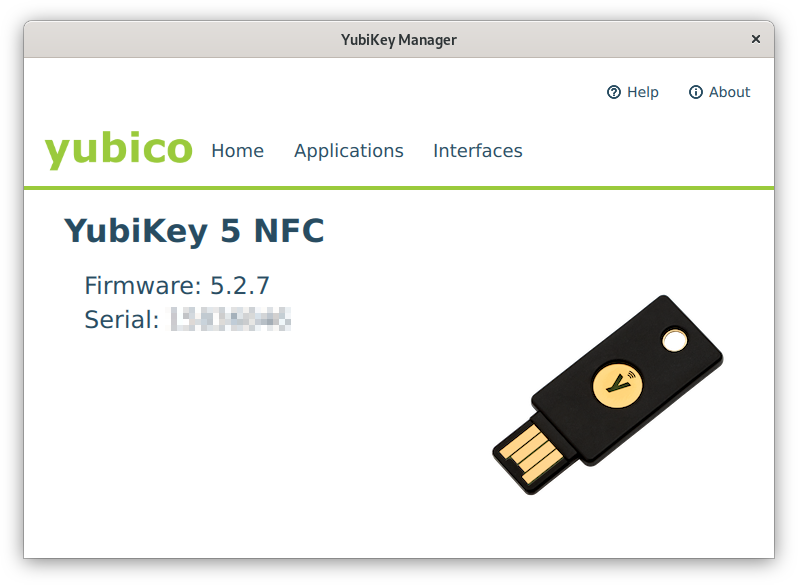
| Connect the YubiKey to your computer and run the YubiKey Manager executable. The home screen of the program will show the hardware version of the YubiKey and its serial number (Fig. 1). |
Fig. 1: YubiKey Manager - Home screen (click on image for large view)
|
| Step 2: Configure YubiKey | |
|
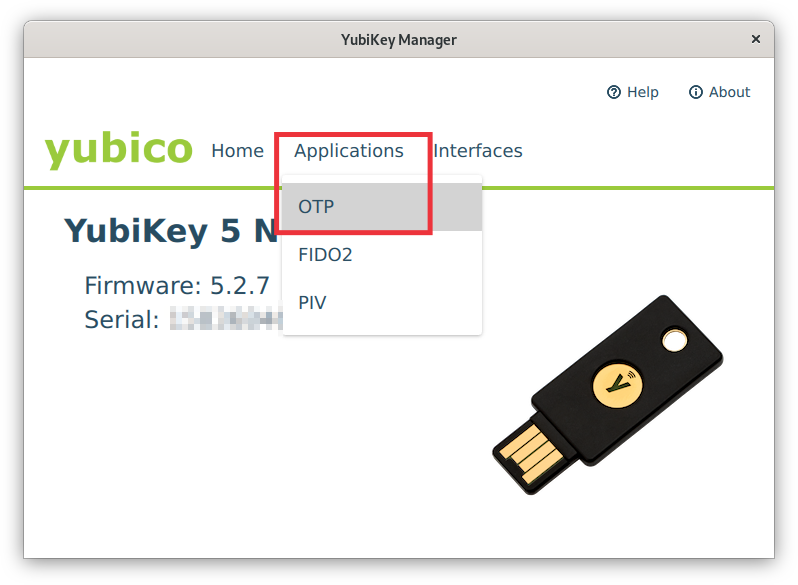
Fig. 2: YubiKey Manager - Applications menu (click on image for large view)
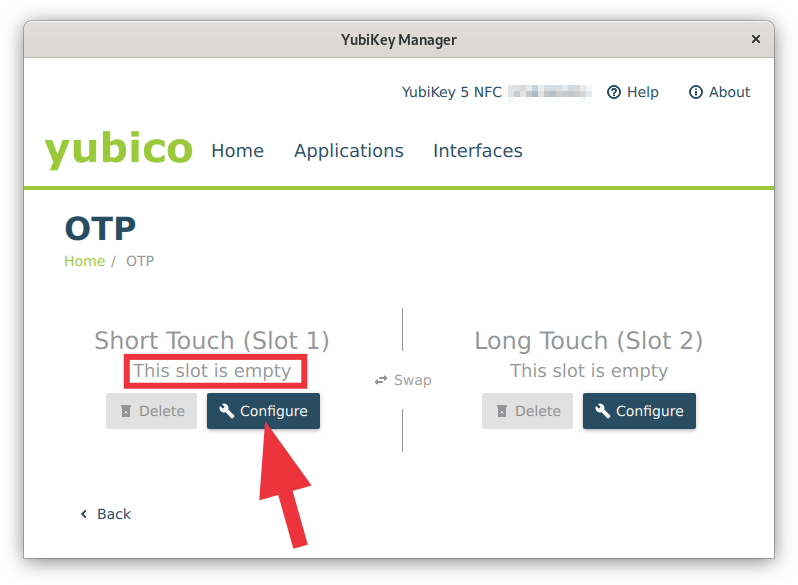
Fig. 3: YubiKey Manager - Slot selection (click on image for large view)
Fig. 4: YubiKey Manager - OTP: Select Credential Type (click on image for large view)
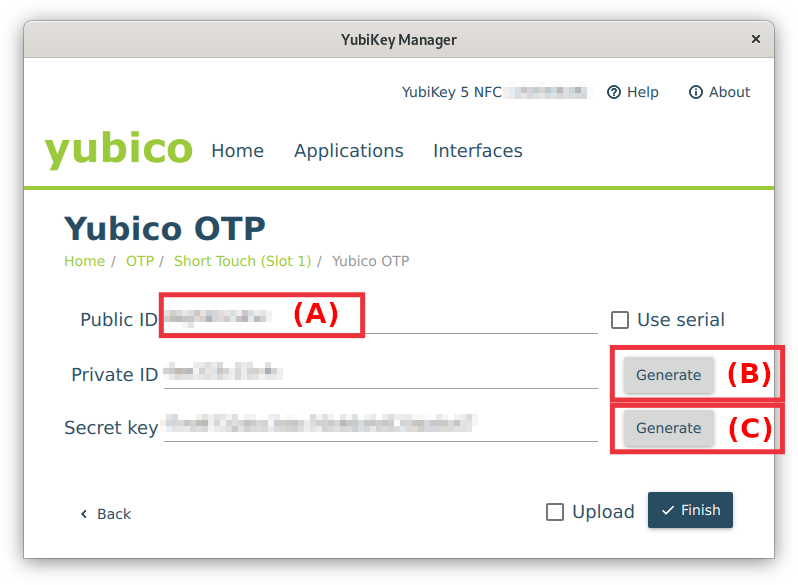
Fig. 5: YubiKey Manager - Yubico OTP settings (click on image for large view)
Fig. 6: YubiKey Manager - YubiKey configuration finished (click on image for large view)
|
NOTE
Use secret keys only once! If the procedure fails or you lose the secret key, generate a new one. Never save the secret key on your local computer or the HPC system.
3. Rollout YubiKey Token
|
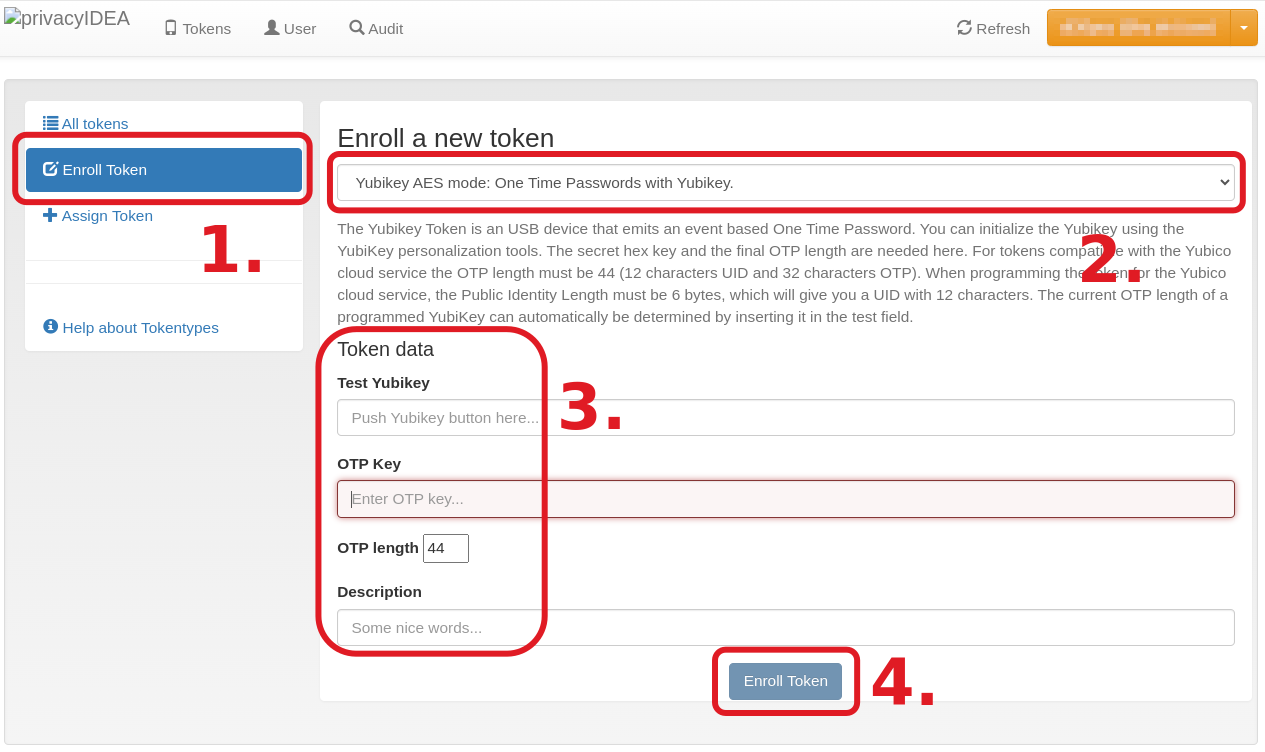
Fig. 7: Steps 1-4 of YubiKey token rollout (click on image for large view)
Fig. 8: Rollout finished (click on image for large view)
|
4. Manage Tokens
Two-Factor Authentication: Token Management in SIM-MFA web portal


