Create a personal network
Instead of using one of the two networks MWN and Internet provided by default, you can create your own private network.
To create a network, you need to follow a few steps withing the OpenStack horizon web interface.
- Log in to the horizon web interface.
- Create the network
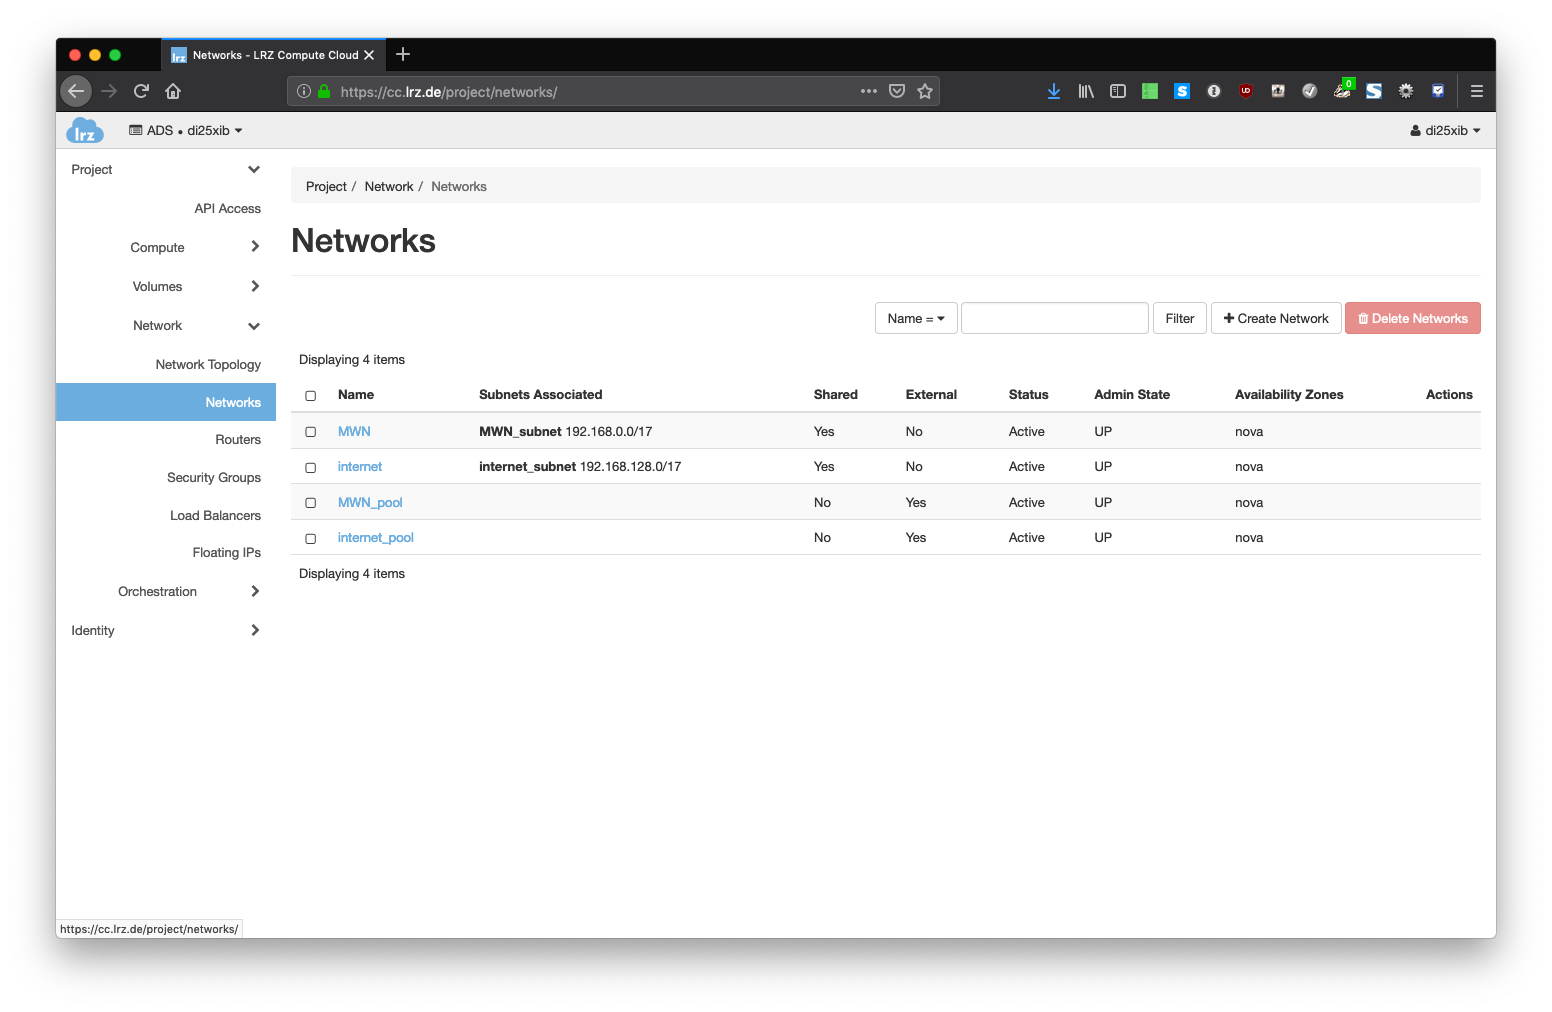
- Go to Network → Networks tab and click on Create Network.
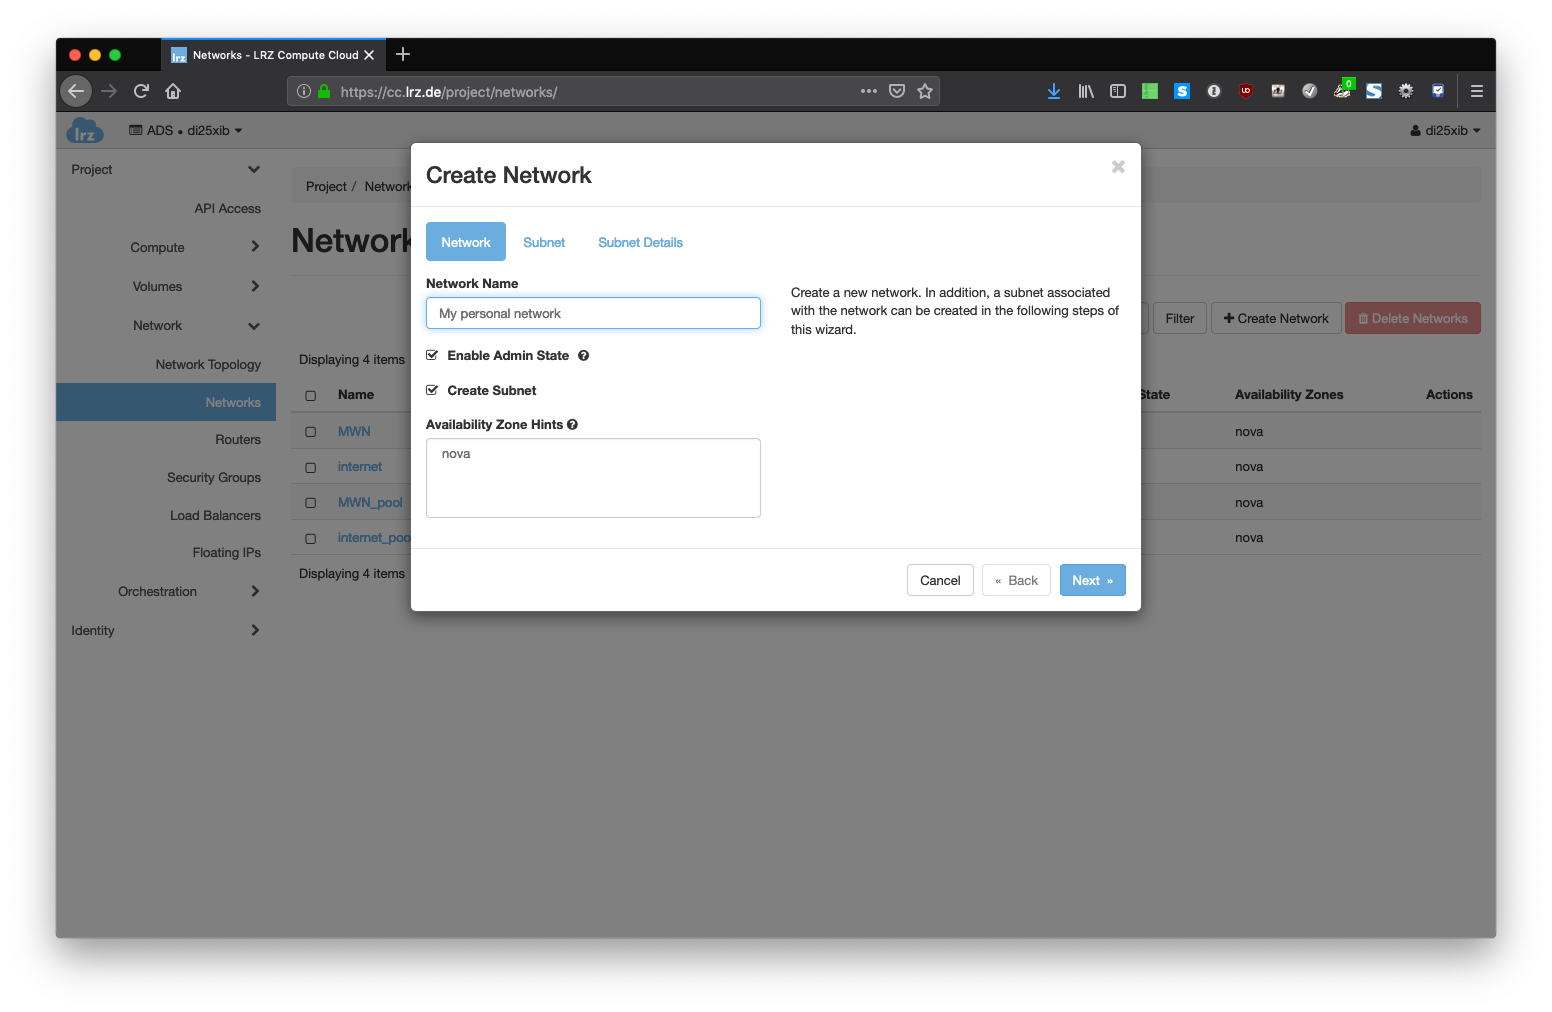
- Provide a network name you like and click on "Next".
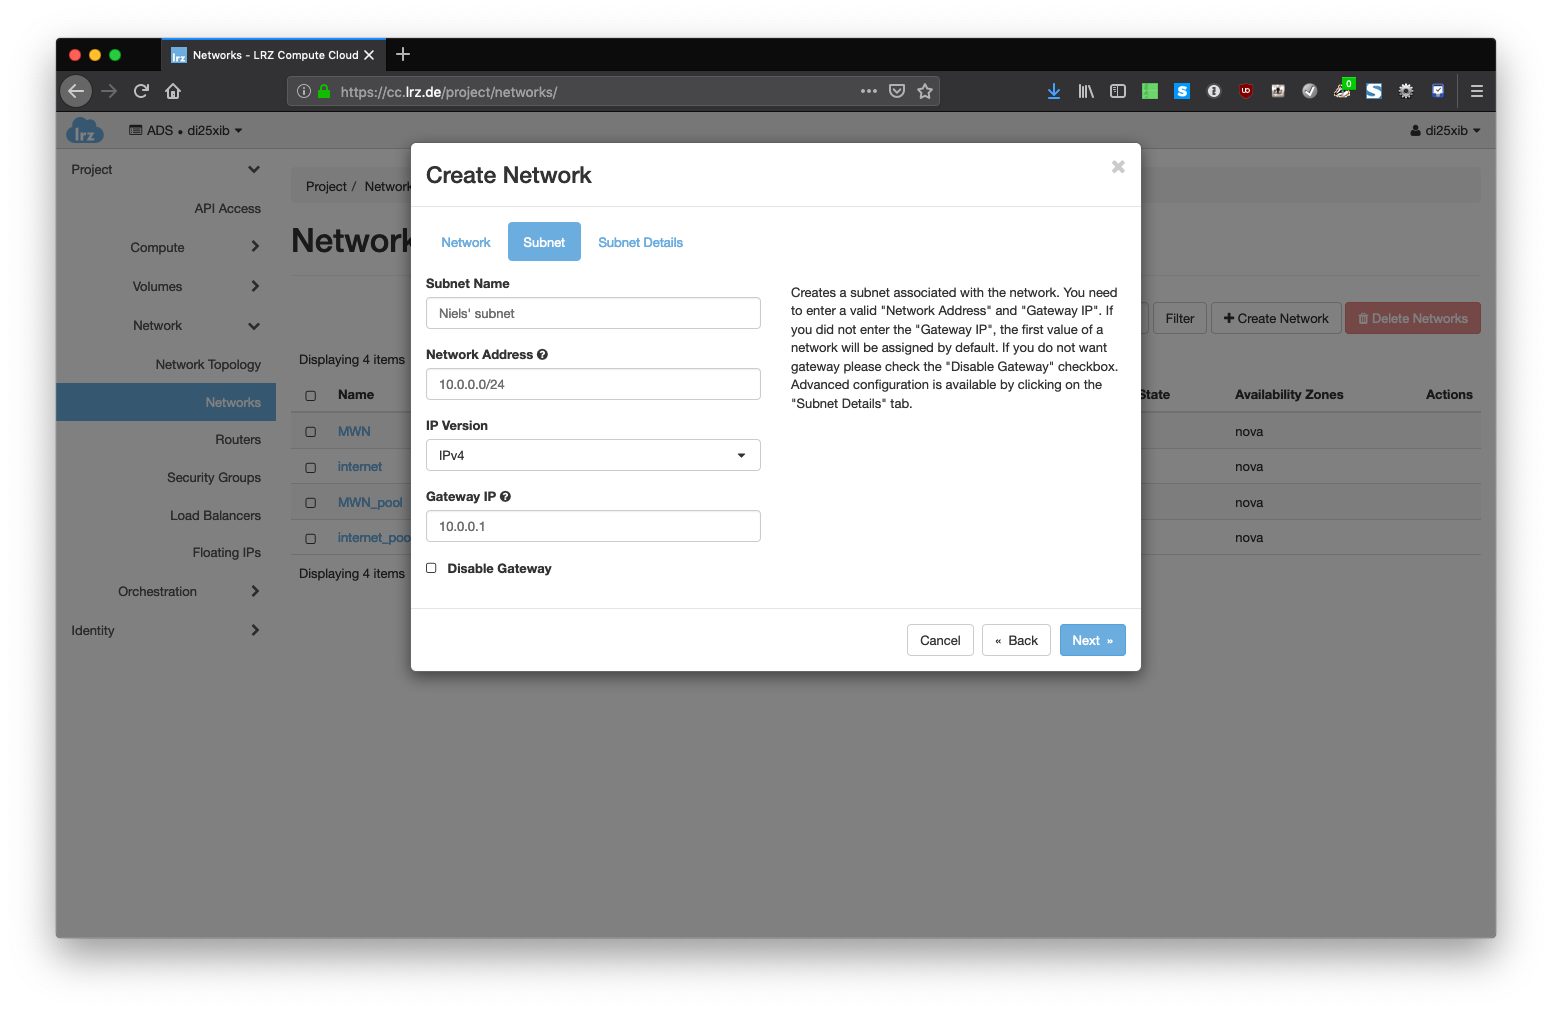
- In the Subnet tab you need to provide a subnet name (you can freely choose a name you want), a network address in CIDR format (like 10.0.0.0/24), the IP Version (only IPv4 is supported for the moment and a gateway IP for the VMs in this network, which is usually the first IP in your subnet, e.g. 10.0.0.1.
You must have a gateway enabled if you want your VMs to be able to access the MWN or Internet later.
Click on Next to continue. - In the Subnet details tab you can specify specific attributes to create the networks to your needs. You can also leave all fields blank and click Create to create this network.
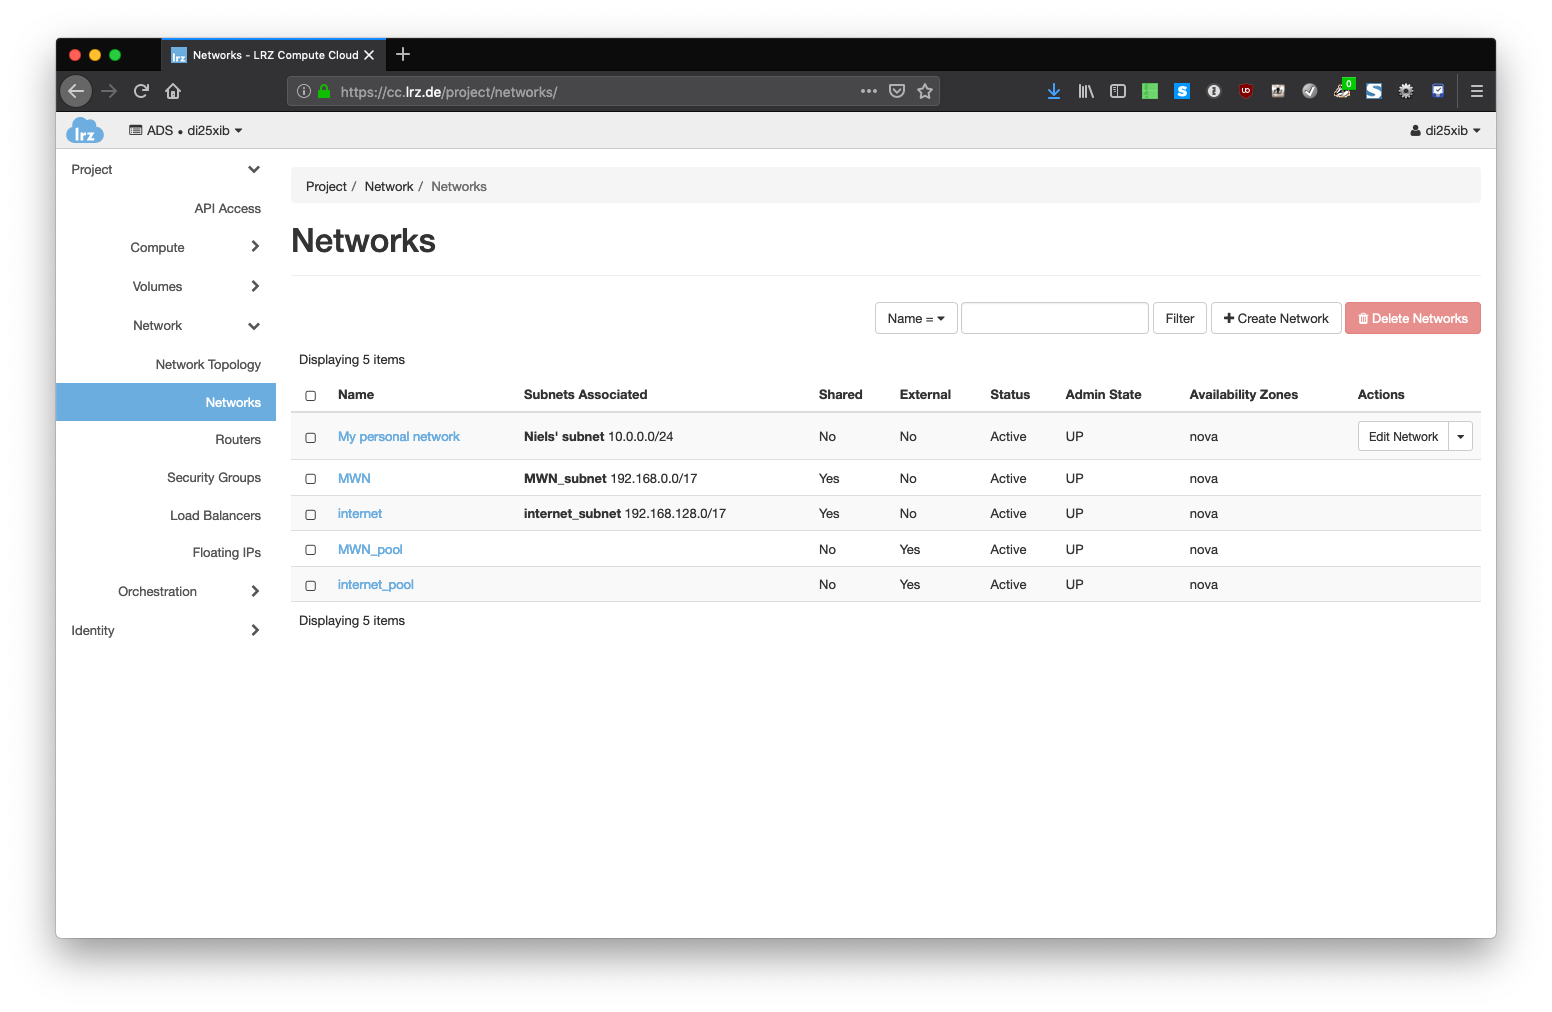
- Back on the Networks overview page you can see your newly created network. The shared attribute is set to No which means that this network can be only be used by you.
- Go to Network → Networks tab and click on Create Network.
- Create a router
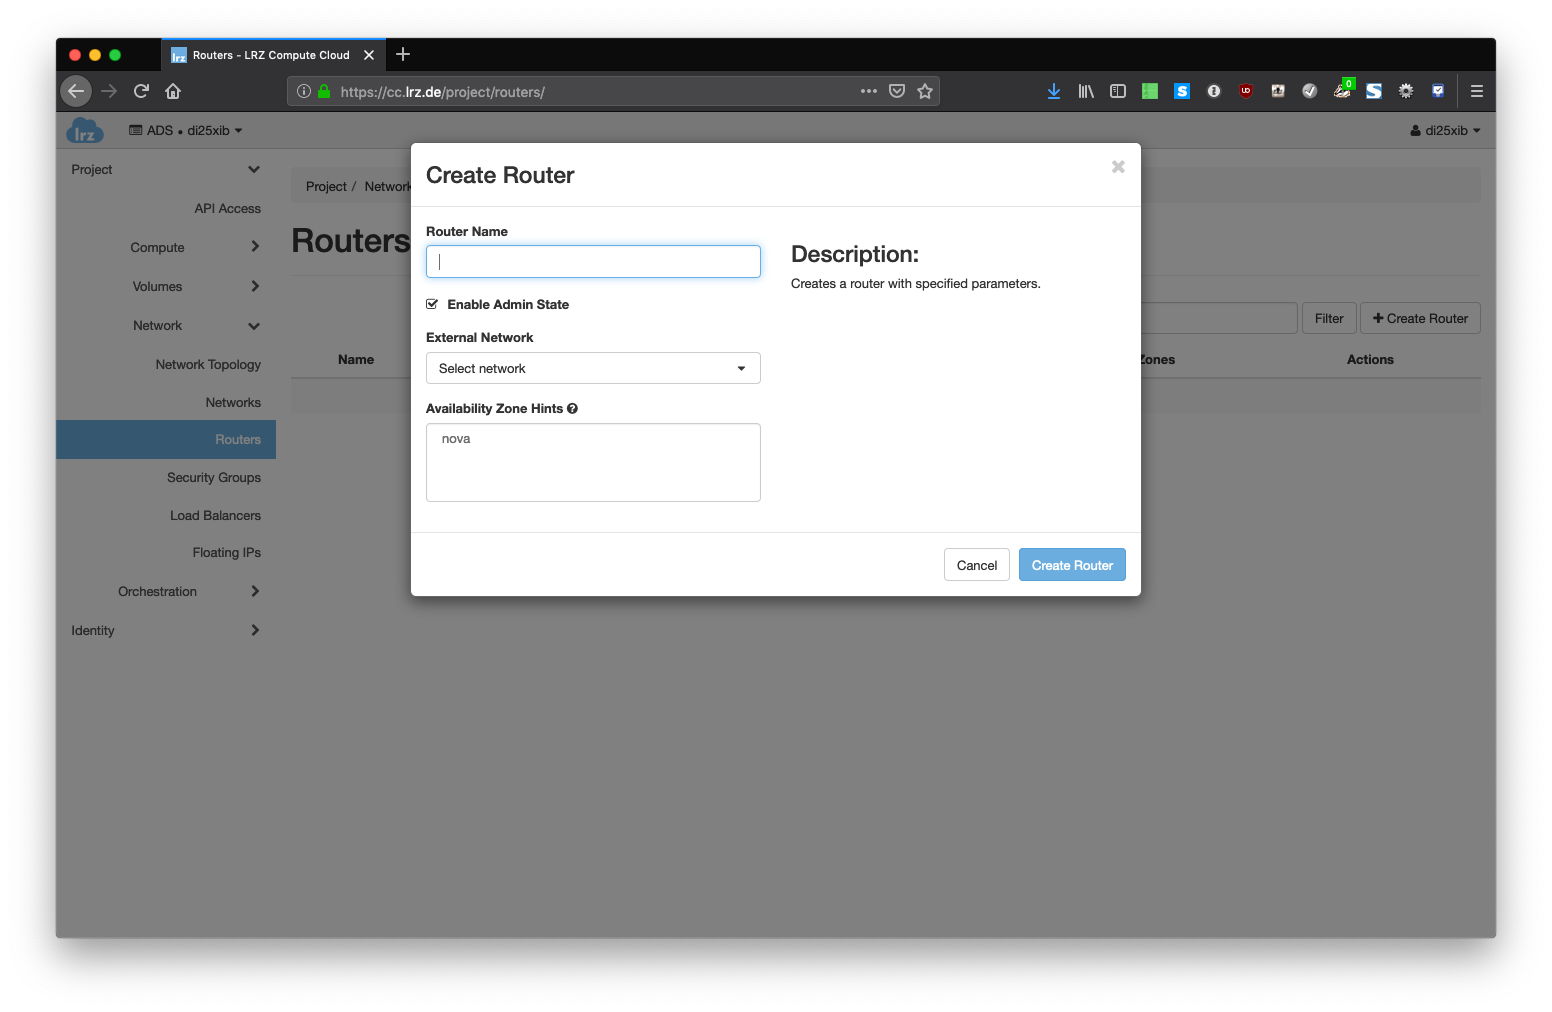
- If you want to have access to the outside world, you also need to create a router that connects your newly created network with one of our provider networks that prevent access from the outside. Go to the Network → Routers page and click on Create Router.
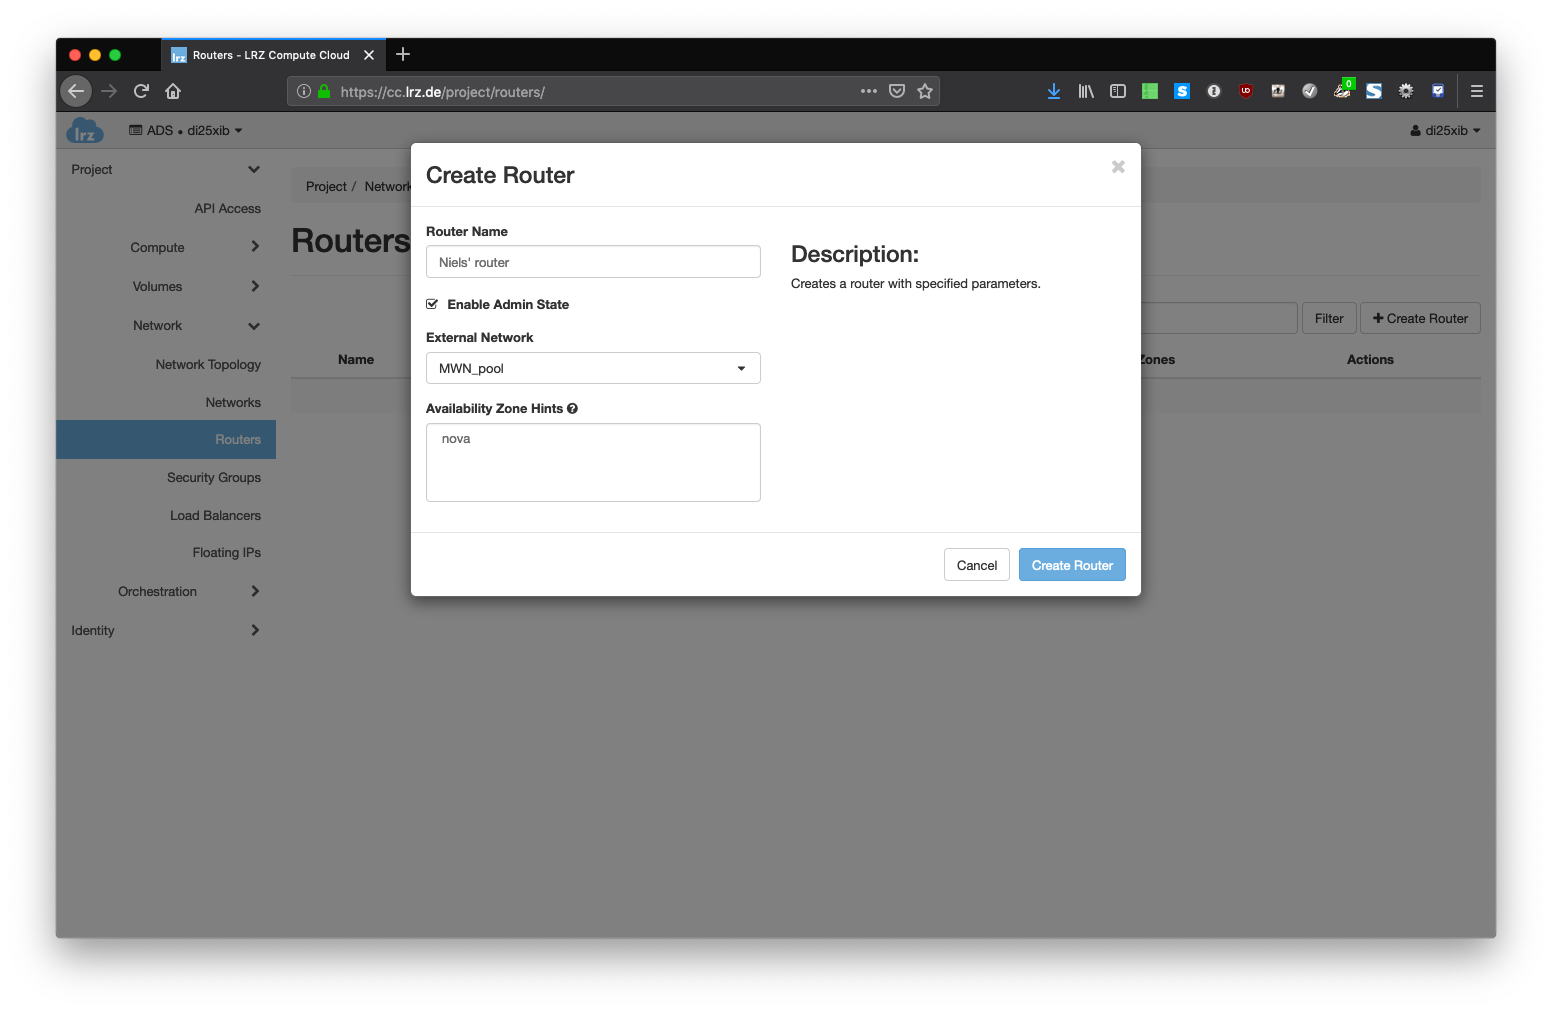
- Give this router a name and select an external network to which this router is connected. In our case you can select MWN_pool or Internet_pool. You should select MWN_pool here unless you have a reason to select Internet_pool.
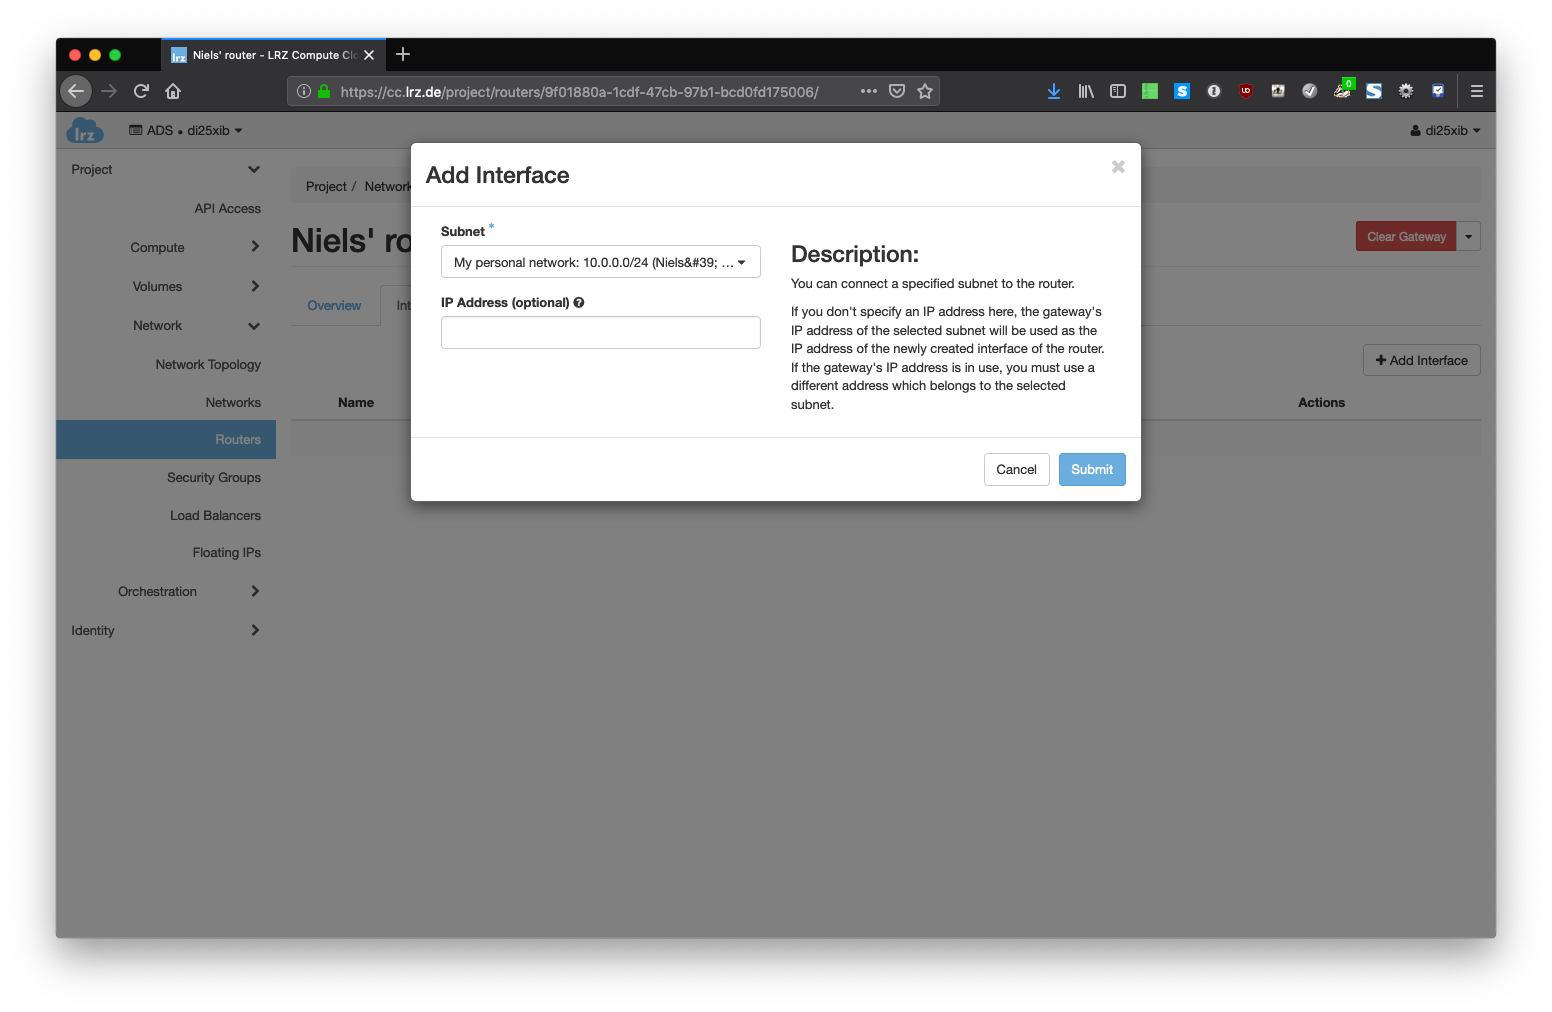
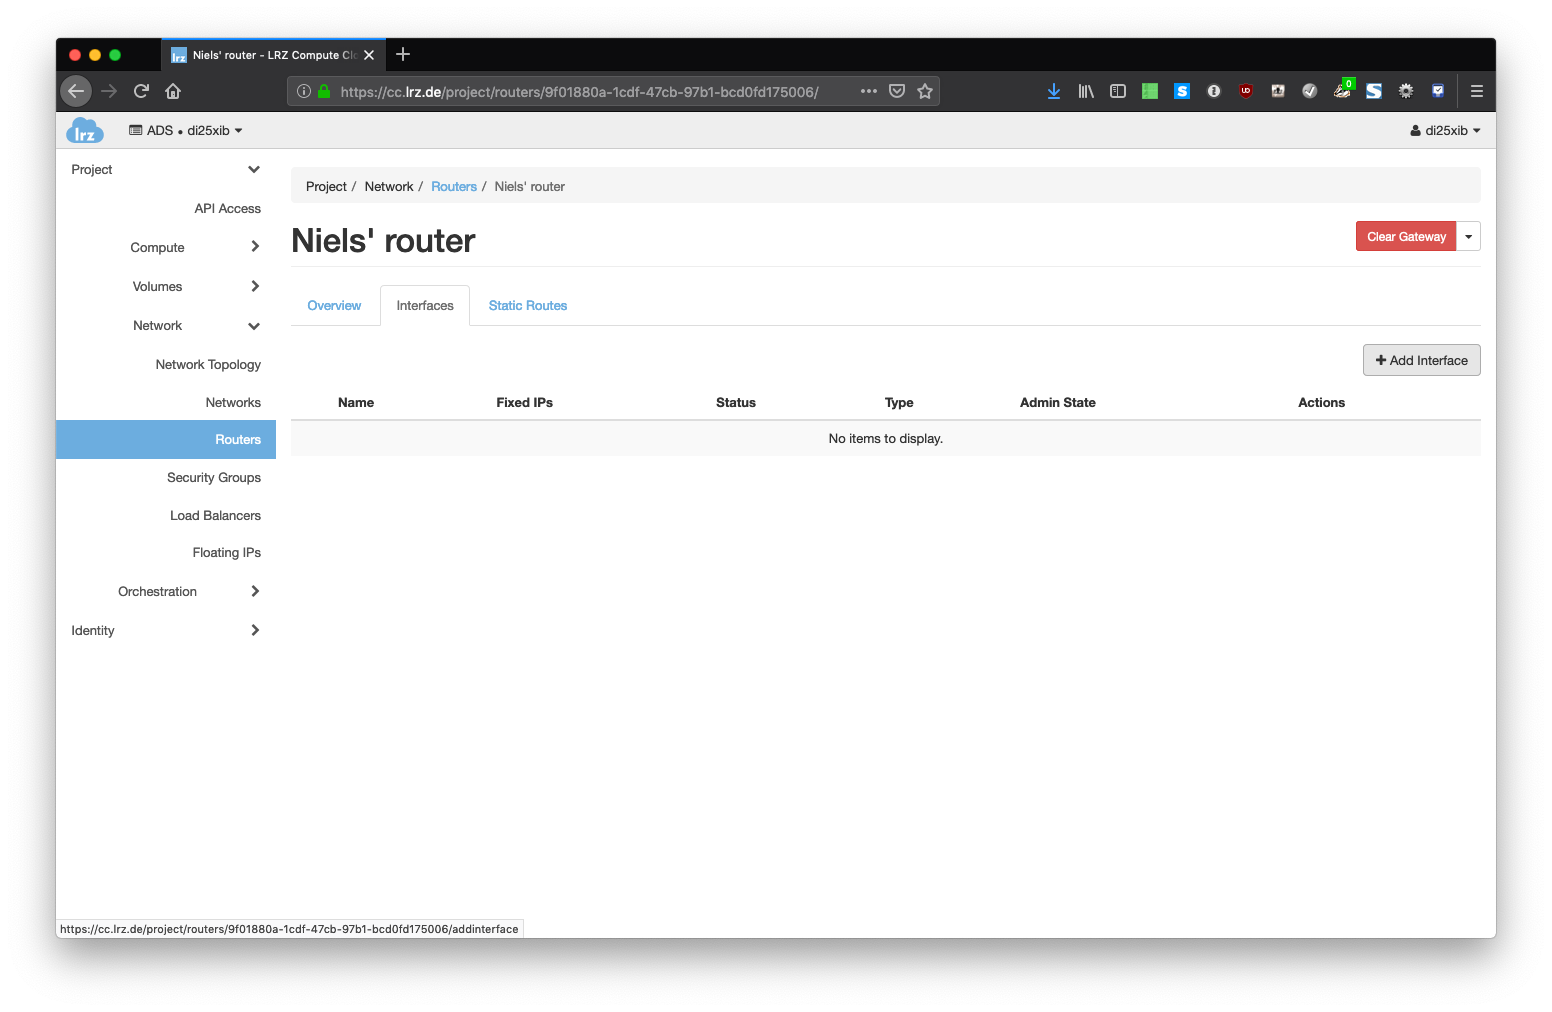
- To connect this router to your network, click on the Router and change to the Interfaces tab. Click on Add Interface.
- In the Subnet dropdown field you must select the network you have created in Step 2. Leave the IP Address field empty and click Submit.
- If you want to have access to the outside world, you also need to create a router that connects your newly created network with one of our provider networks that prevent access from the outside. Go to the Network → Routers page and click on Create Router.
- At this point, you have a personal network that is connected to the outside world via a router routing the traffic through a network provided by LRZ. You can now attach this network to your virtual machines when you create new VMs as described by another tutorial.
Attaching floating IPs will work as described in the other tutorial as well. You can assign MWN-Floating-IPs if you connected your router to MWN_pool or assign Internet-Floating-IPs if you connected it to Internet_pool.


